
Whether you're running an online academy, training corporate employees, hosting a webinar, or organizing a workshop, awarding certificates of completion is a vital milestone for your students and attendees. However, creating hundreds of certificates by hand — typing names, formatting dates, exporting PDFs, and filing them into Google Drive — is painfully repetitive and prone to typos.
In this step-by-step guide, you'll learn how to build an automated certificate generation pipeline using Google Sheets, Google Slides, and Foldernest. You can generate certificates on-demand for selected rows or trigger them instantly whenever someone submits a Google Form, Typeform, Tally, JotForm, or Fillout.
Why Automate Certificate Creation with Google Workspace?
Traditional certificate workflows often rely on complex mail merges or expensive third-party SaaS tools that lock your certificate designs into proprietary platforms. Leveraging Google Slides and Google Sheets with FolderNest offers distinct advantages:
- Complete Design Freedom: Design certificates directly in Google Slides using custom fonts, high-resolution vector borders, seals, and branding.
- Zero-Code Automation: No complicated Google Apps Script or coding required — configure dynamic placeholders in minutes.
- Multi-Platform Form Triggers: Generate certificates automatically from Google Forms, Typeform, Tally, JotForm, or Fillout submissions.
- Organized Google Drive Storage: Certificates are saved directly into your designated Google Drive folder with custom file naming.
- Instant URL Tracking in Sheets: Each generated certificate link is automatically written back to your spreadsheet row for easy reference.
Step 1: Open FolderNest from Google Sheets
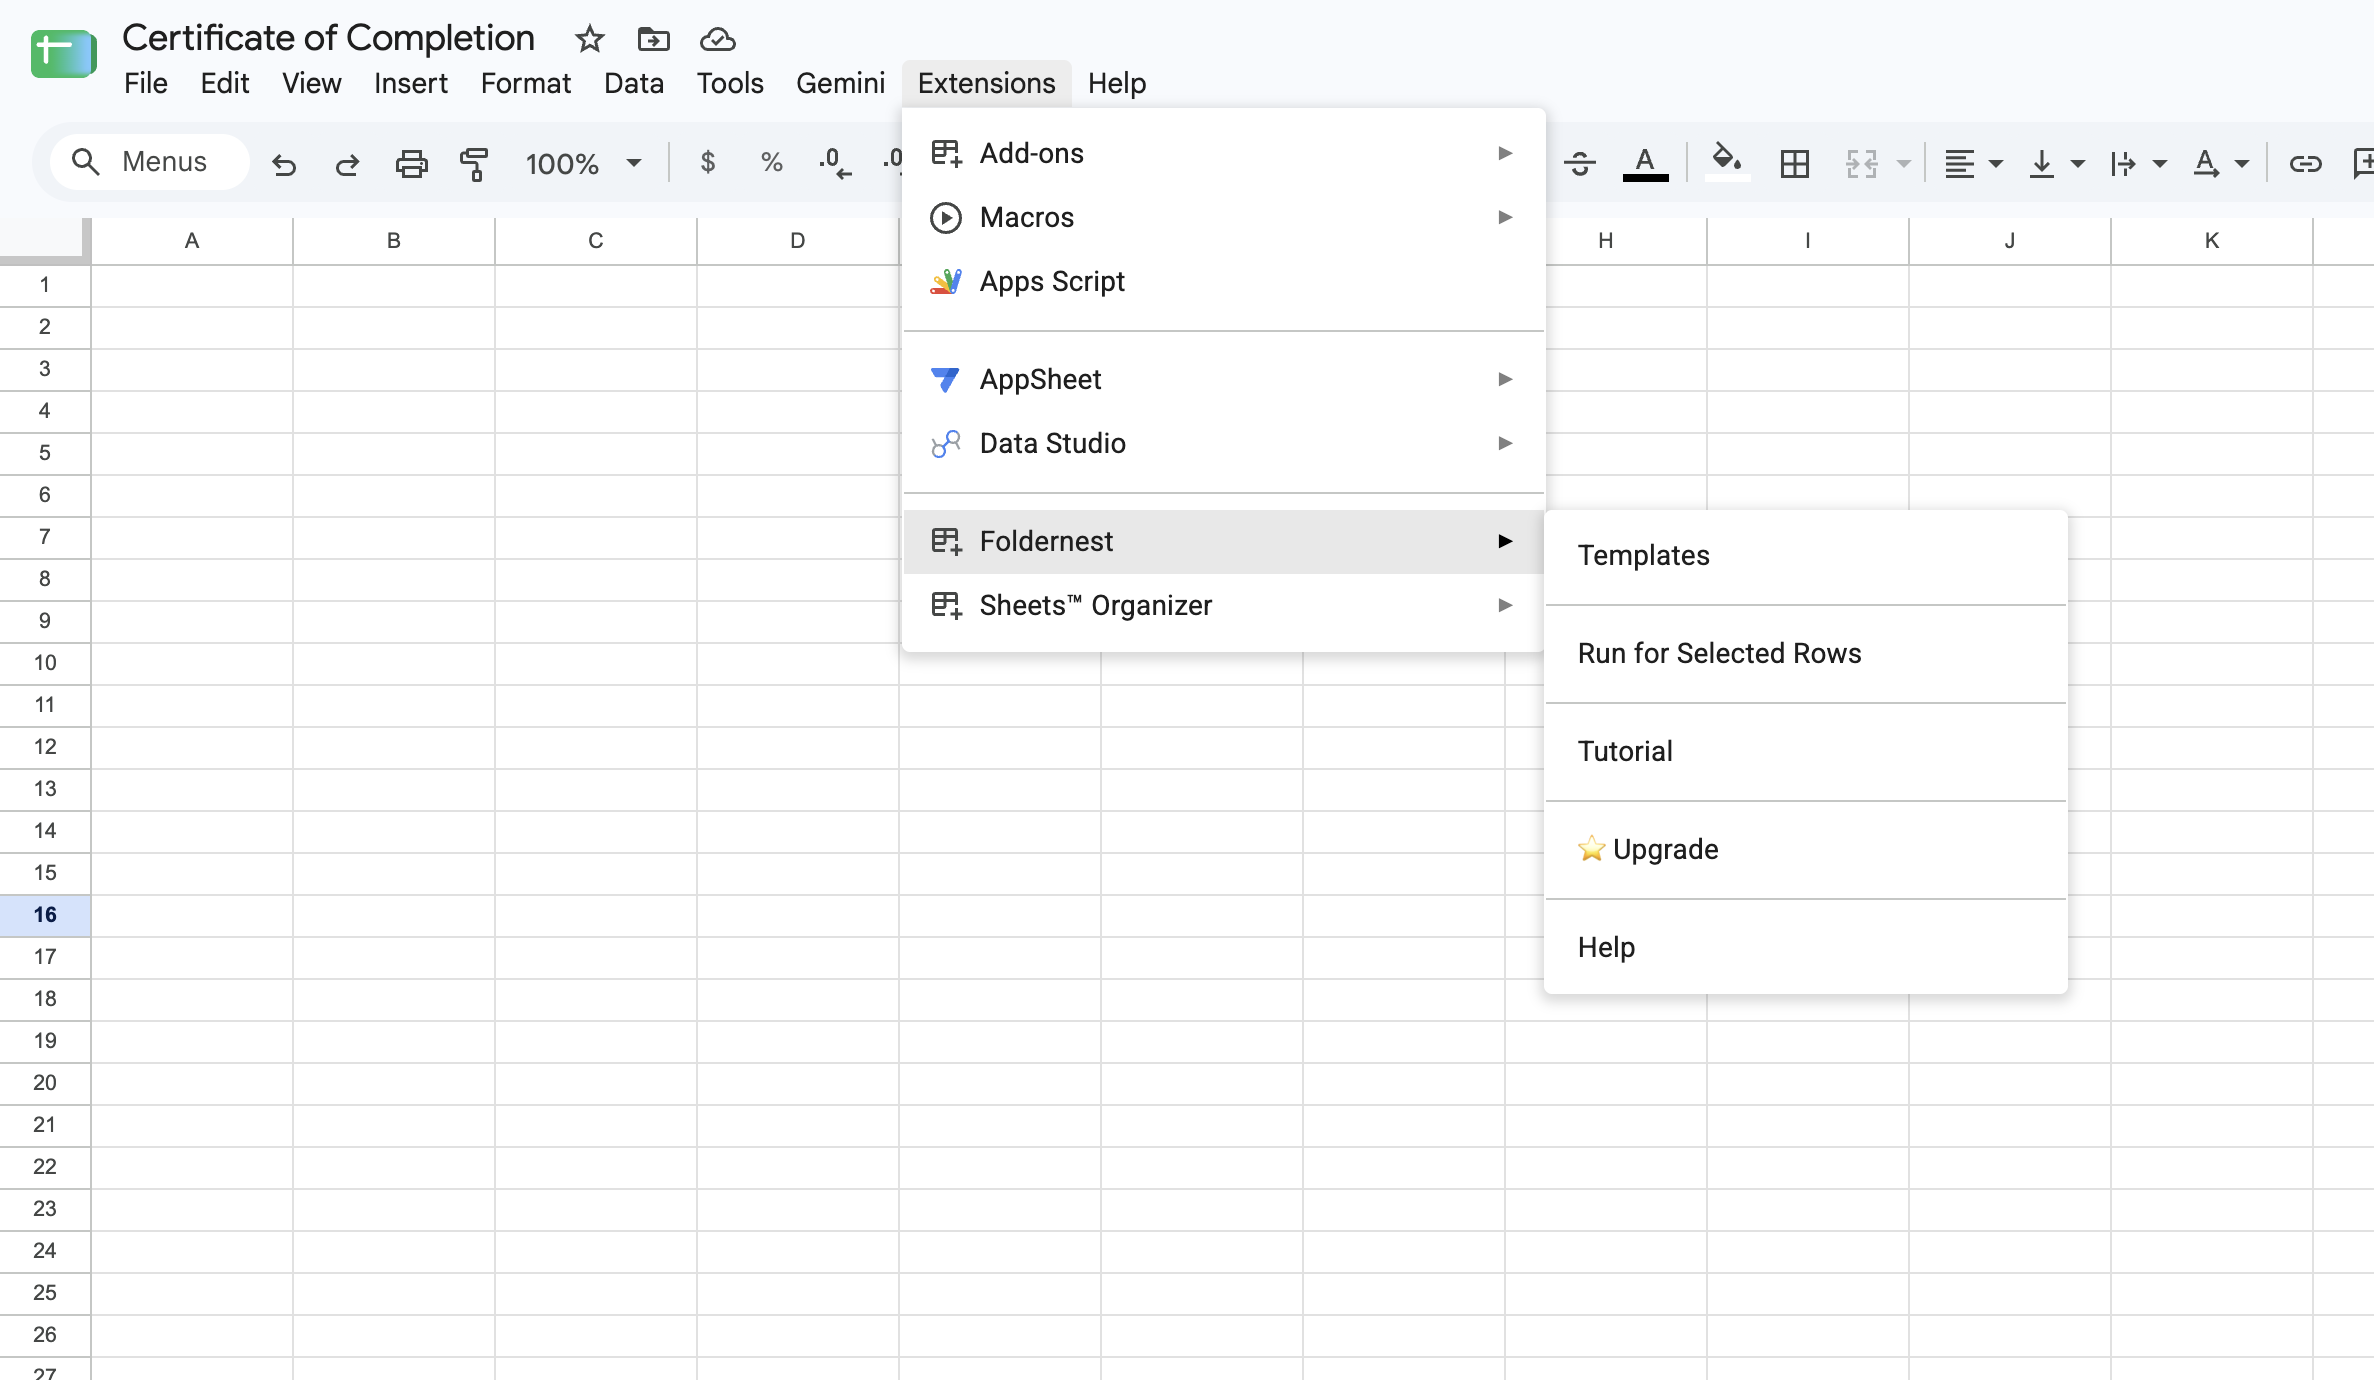
To get started, open the Google Sheet containing your student or attendee information (e.g., Student Name, Course Title, Issue Date, Score, Instructor Name, Student Email). Next, launch FolderNest from the Extensions menu:
- 1. Click Extensions in the Google Sheets top menu.
- 2. Select Foldernest > Templates.
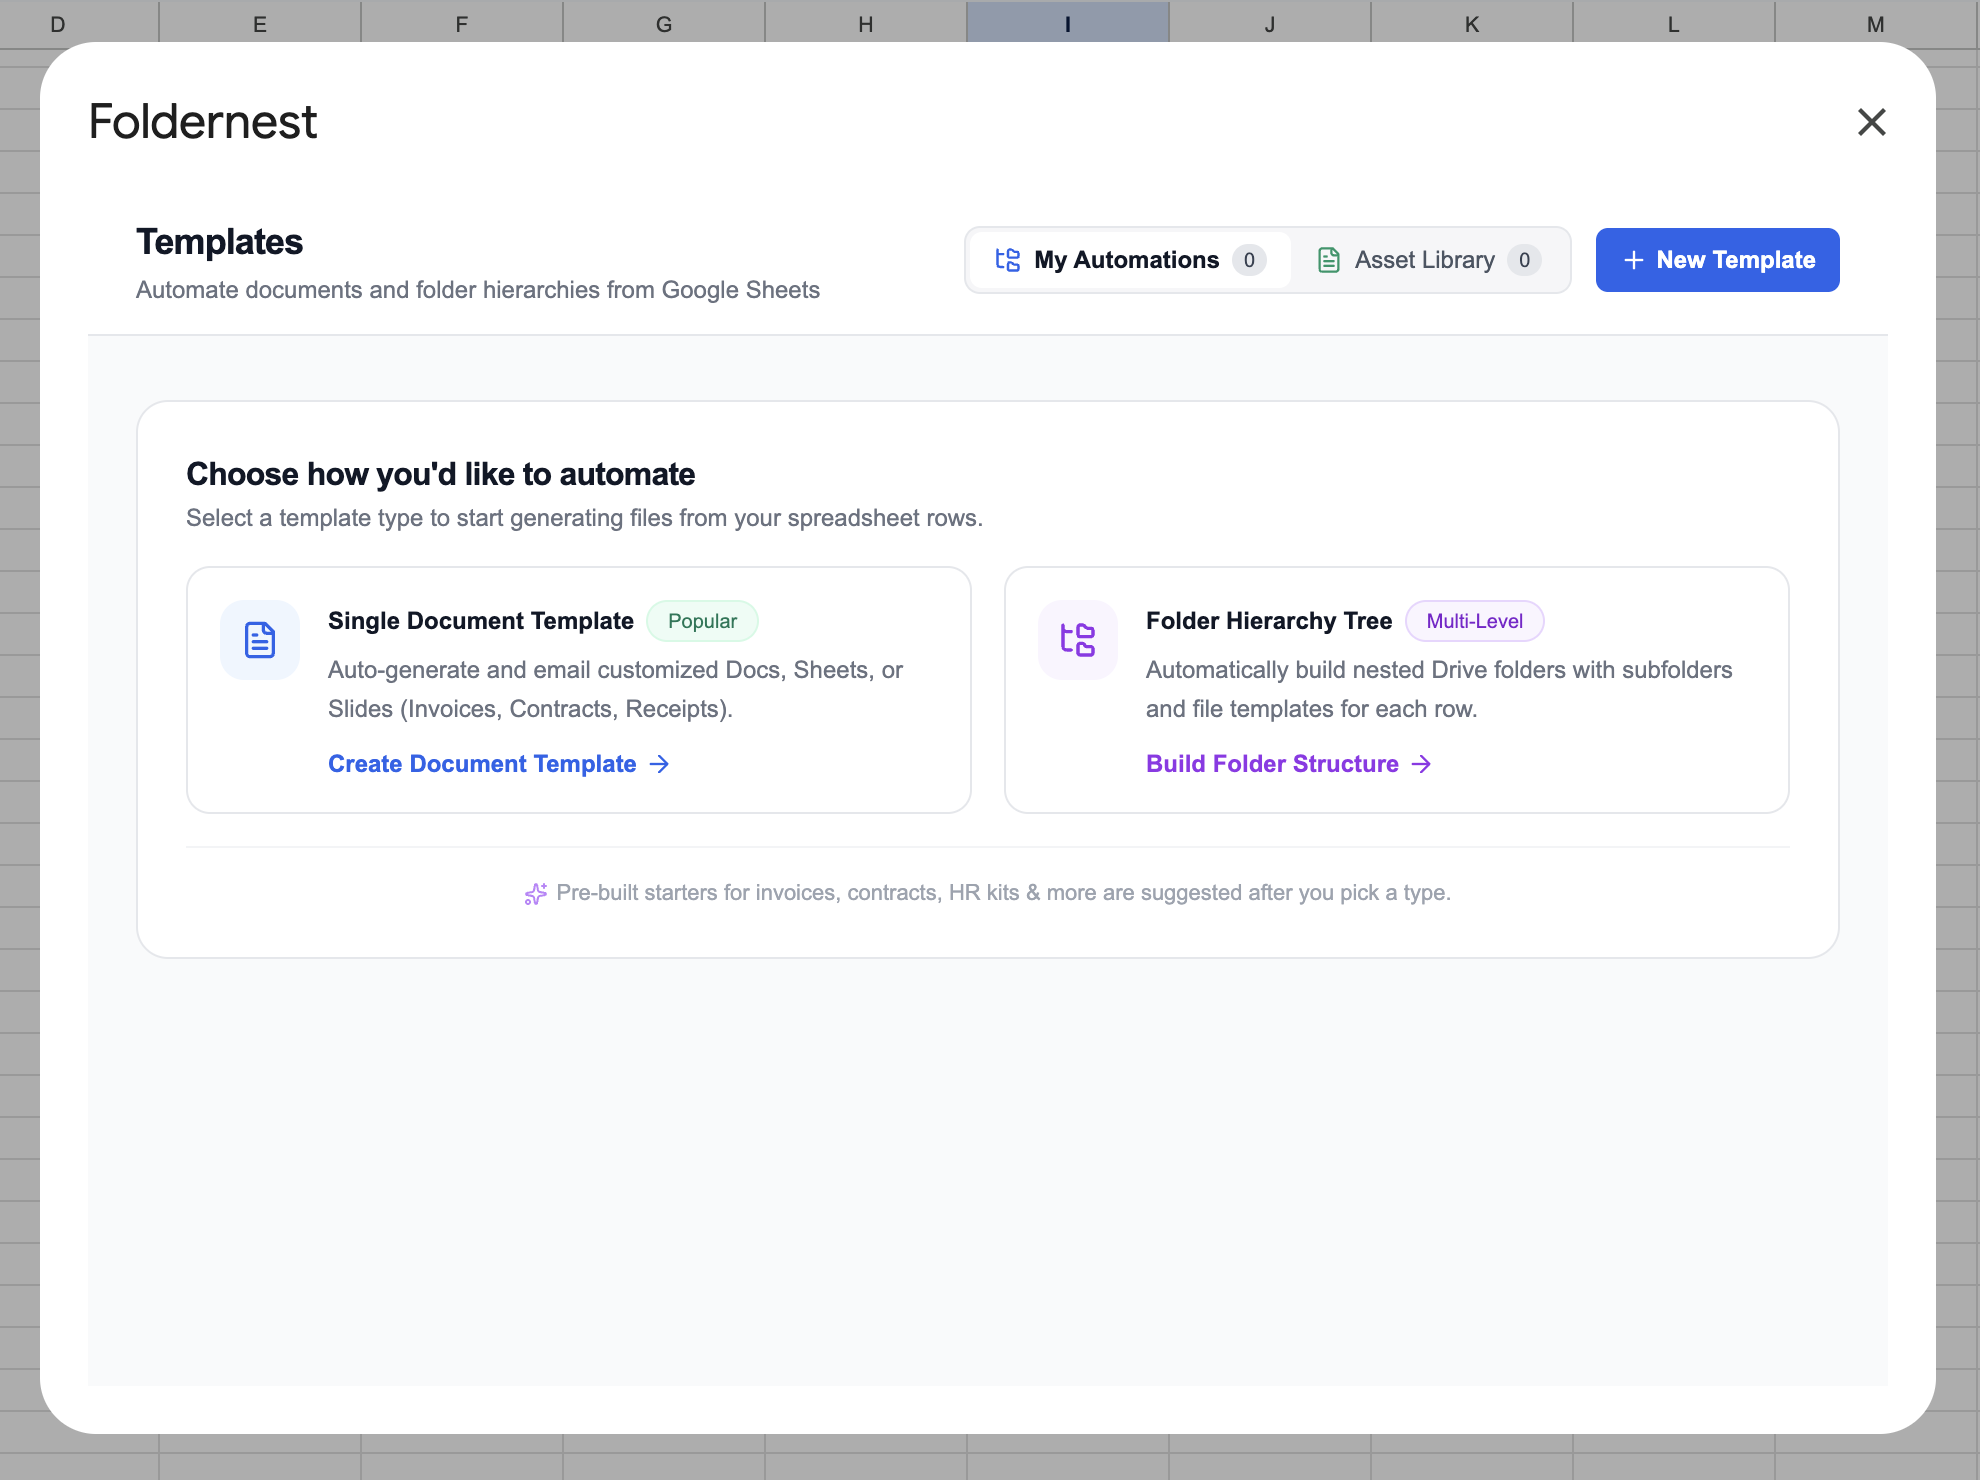
Step 2: Choose 'Single Document Template'
FolderNest supports both nested folder hierarchies and single document workflows. For certificate generation, select Single Document Template.
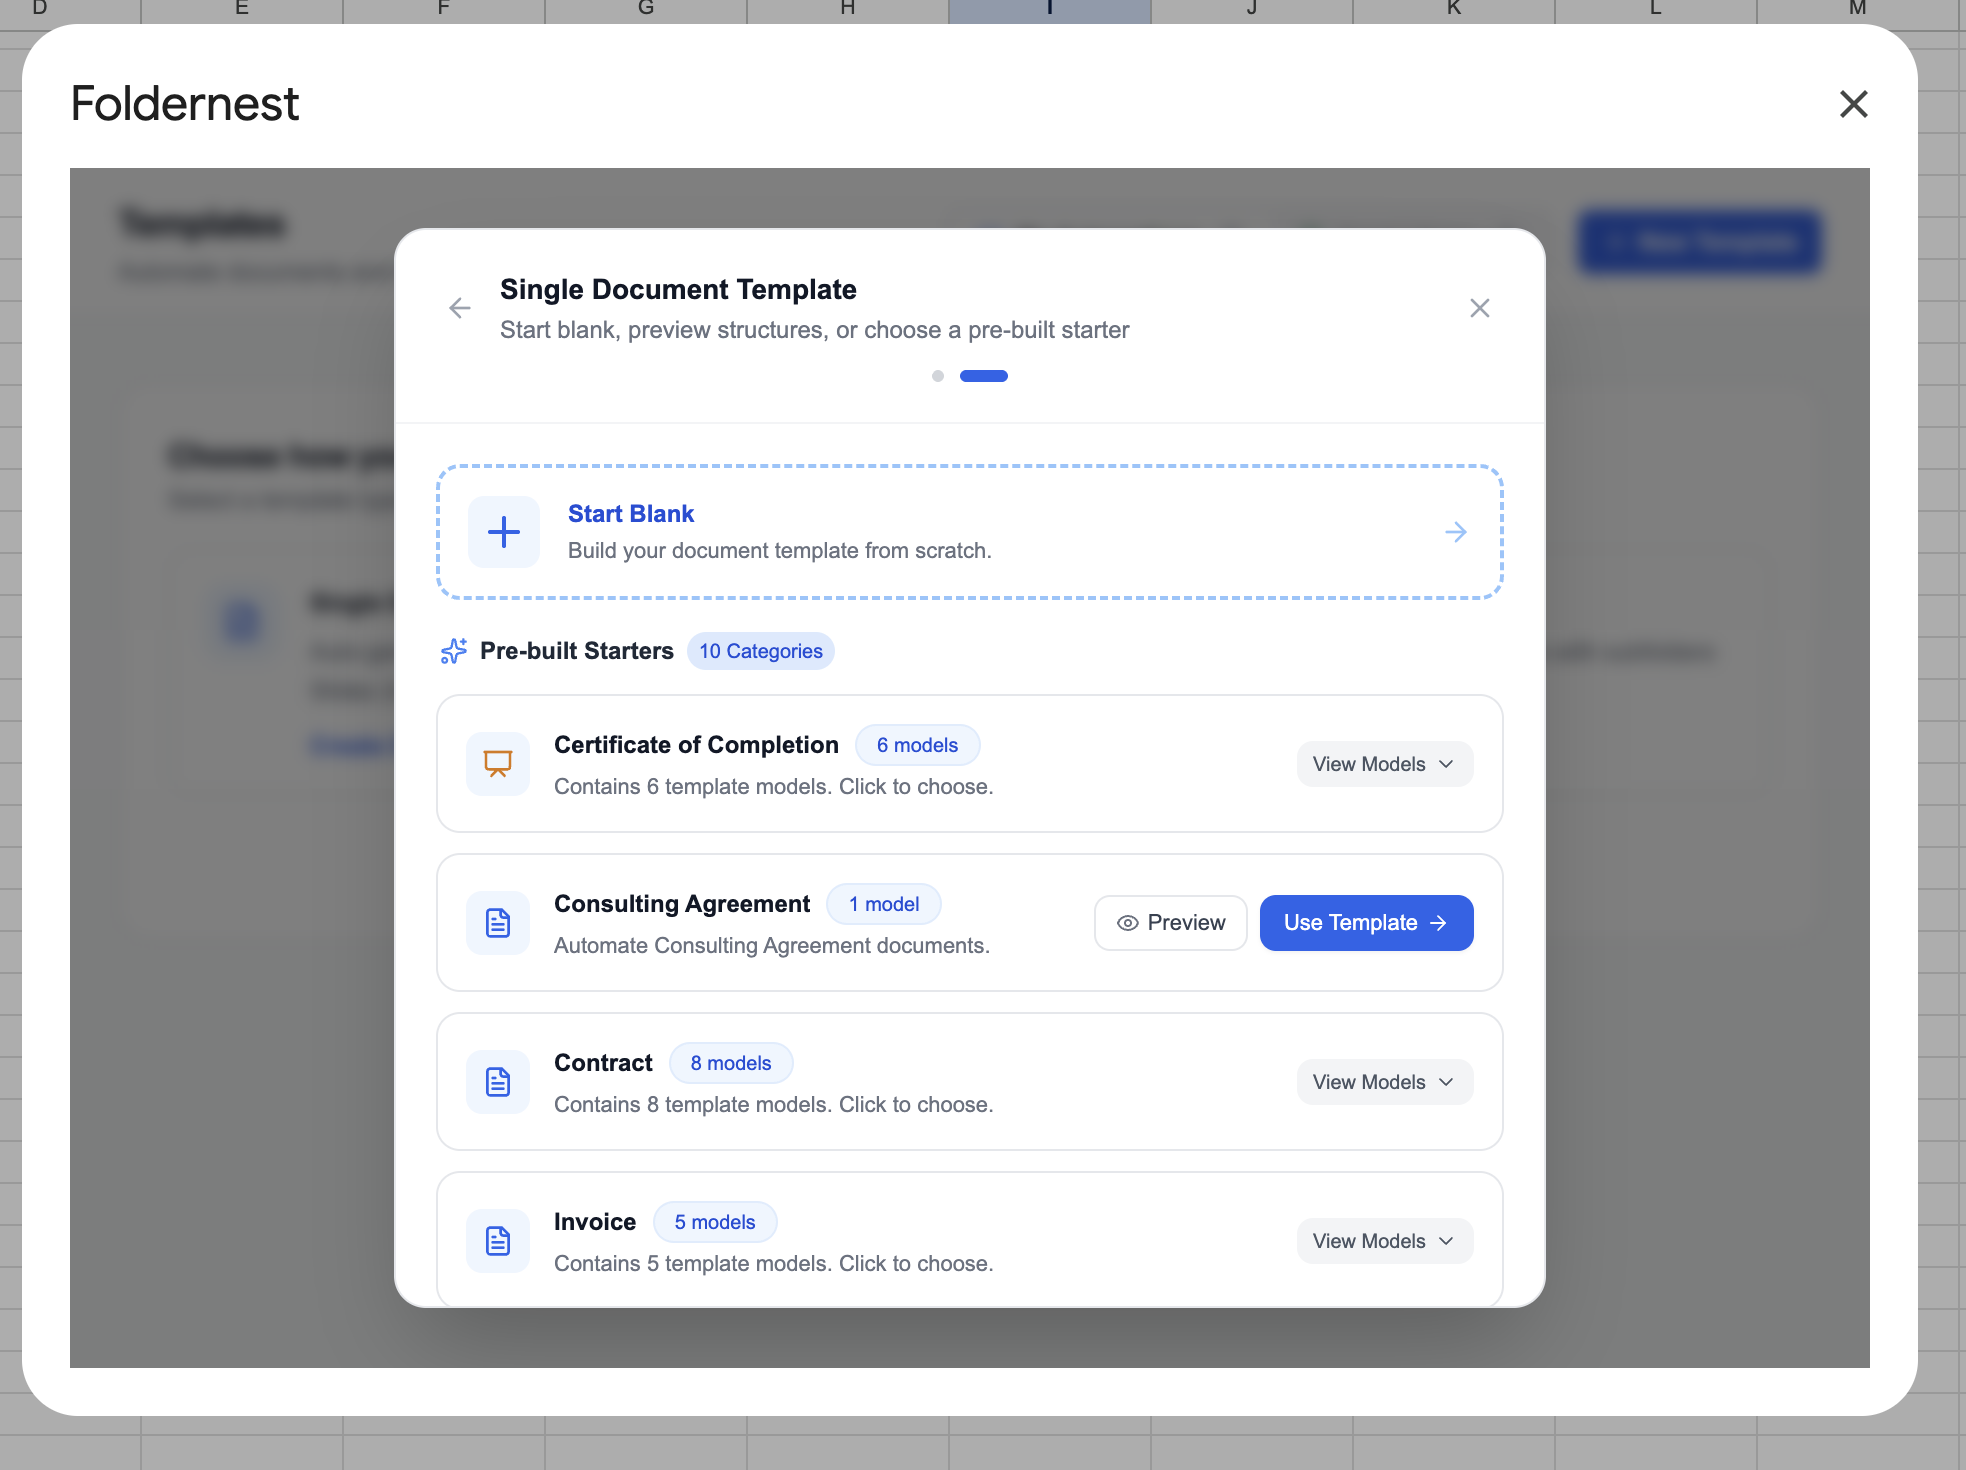
Step 3: Select a Pre-Built Certificate Starter Template
You can start from scratch with your own existing Google Slides presentation or select one of FolderNest's professionally designed Pre-built Starters across 10 categories. Click on Certificate of Completion to view the available models.
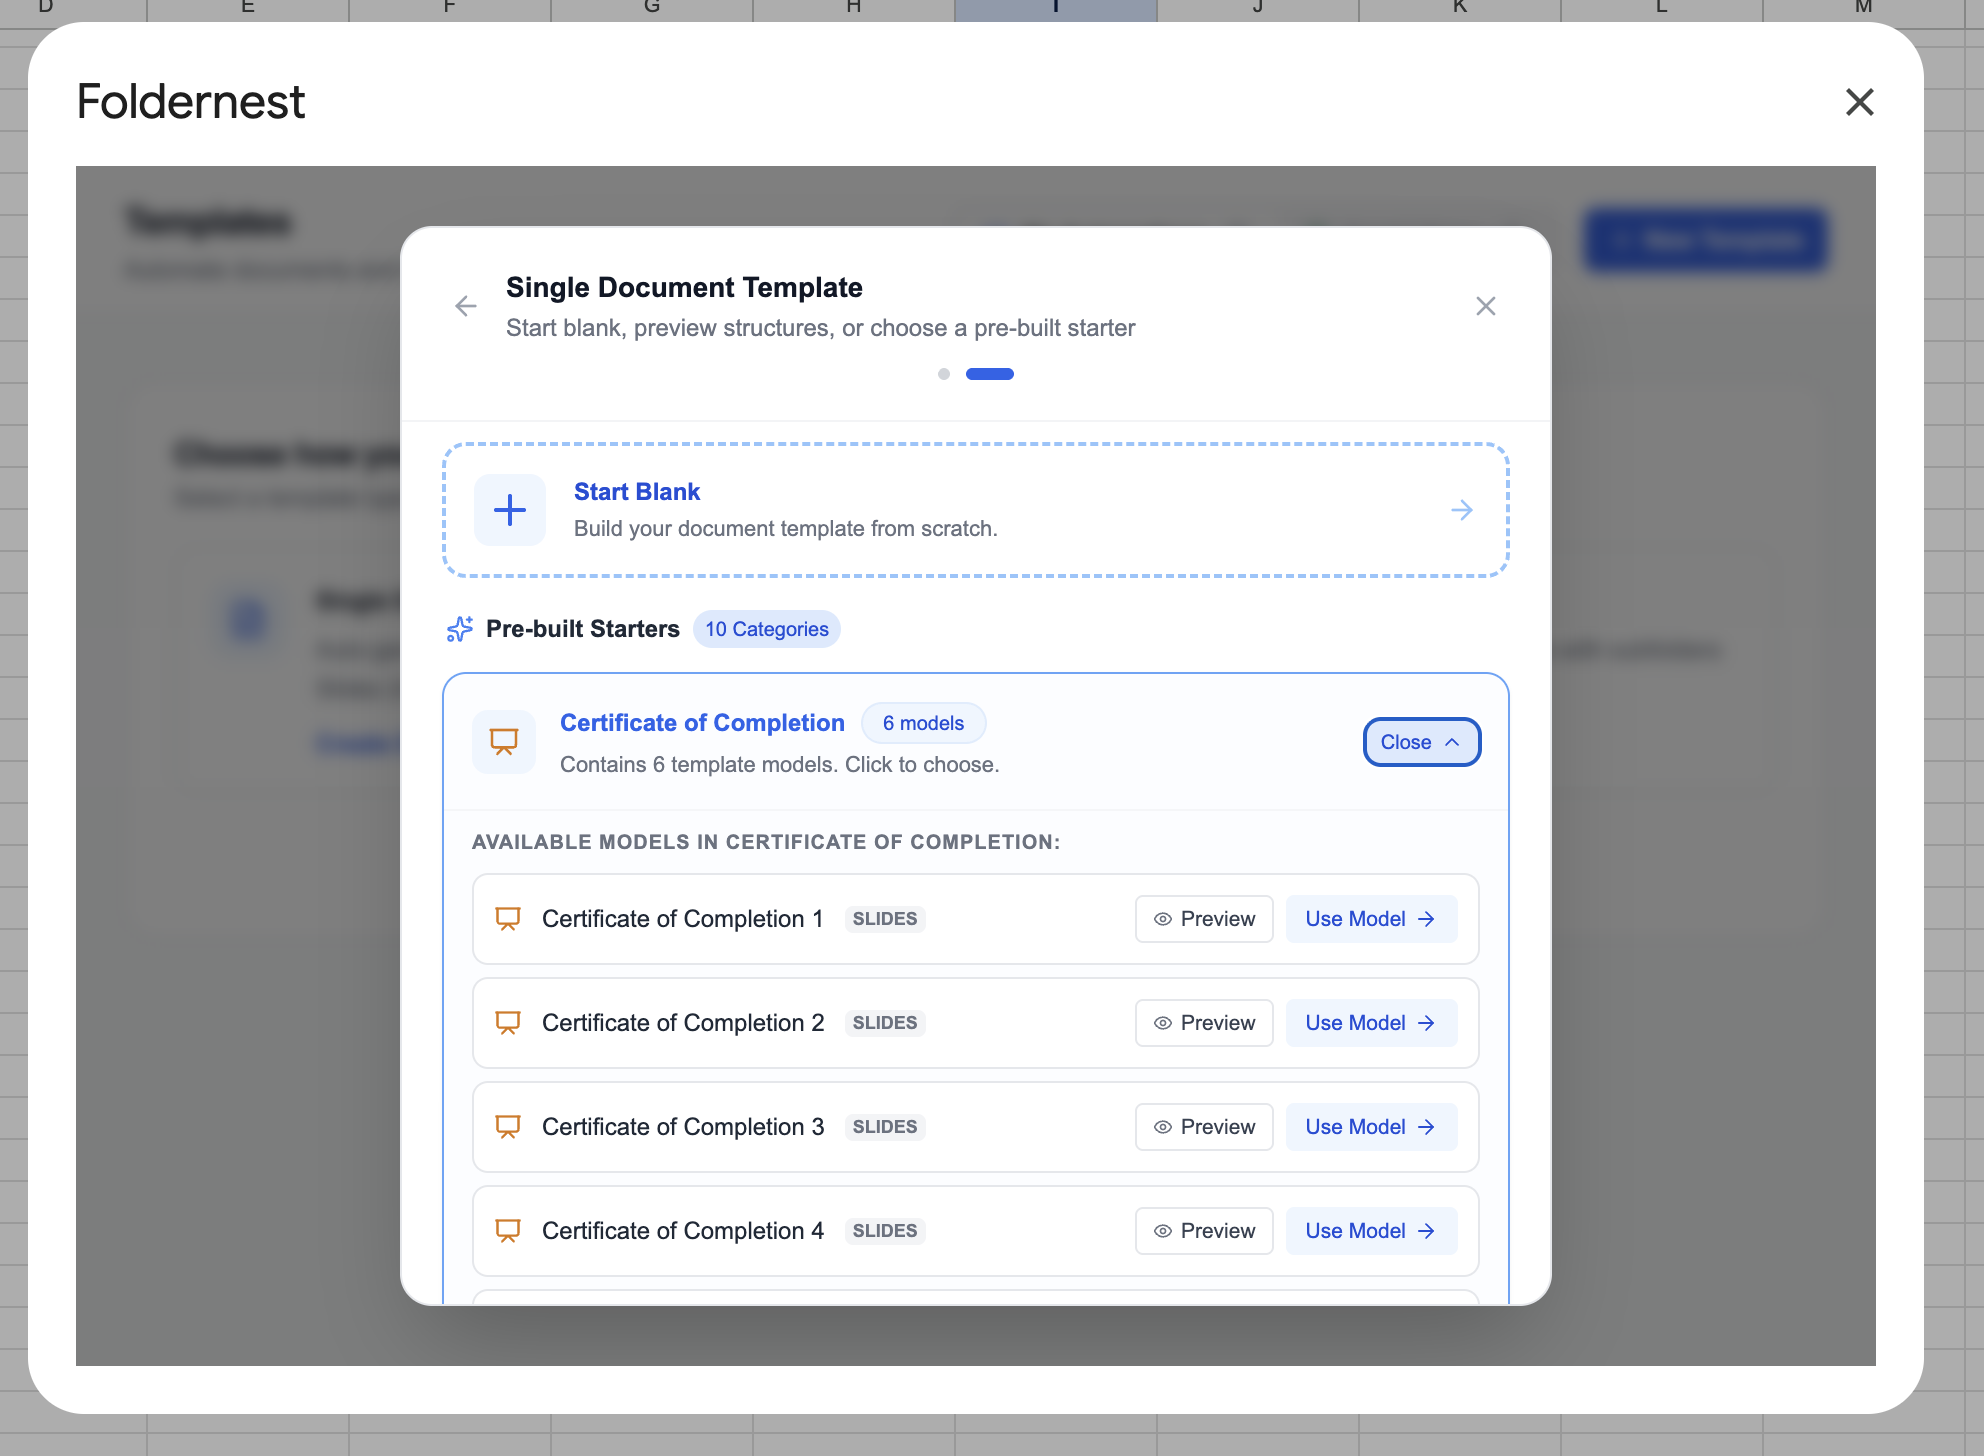
Expand the Certificate of Completion category to preview designs. In this example, we select Certificate of Completion 1 (SLIDES) by clicking Use Model.
Step 4: Understanding Dynamic Template {{Markers}}
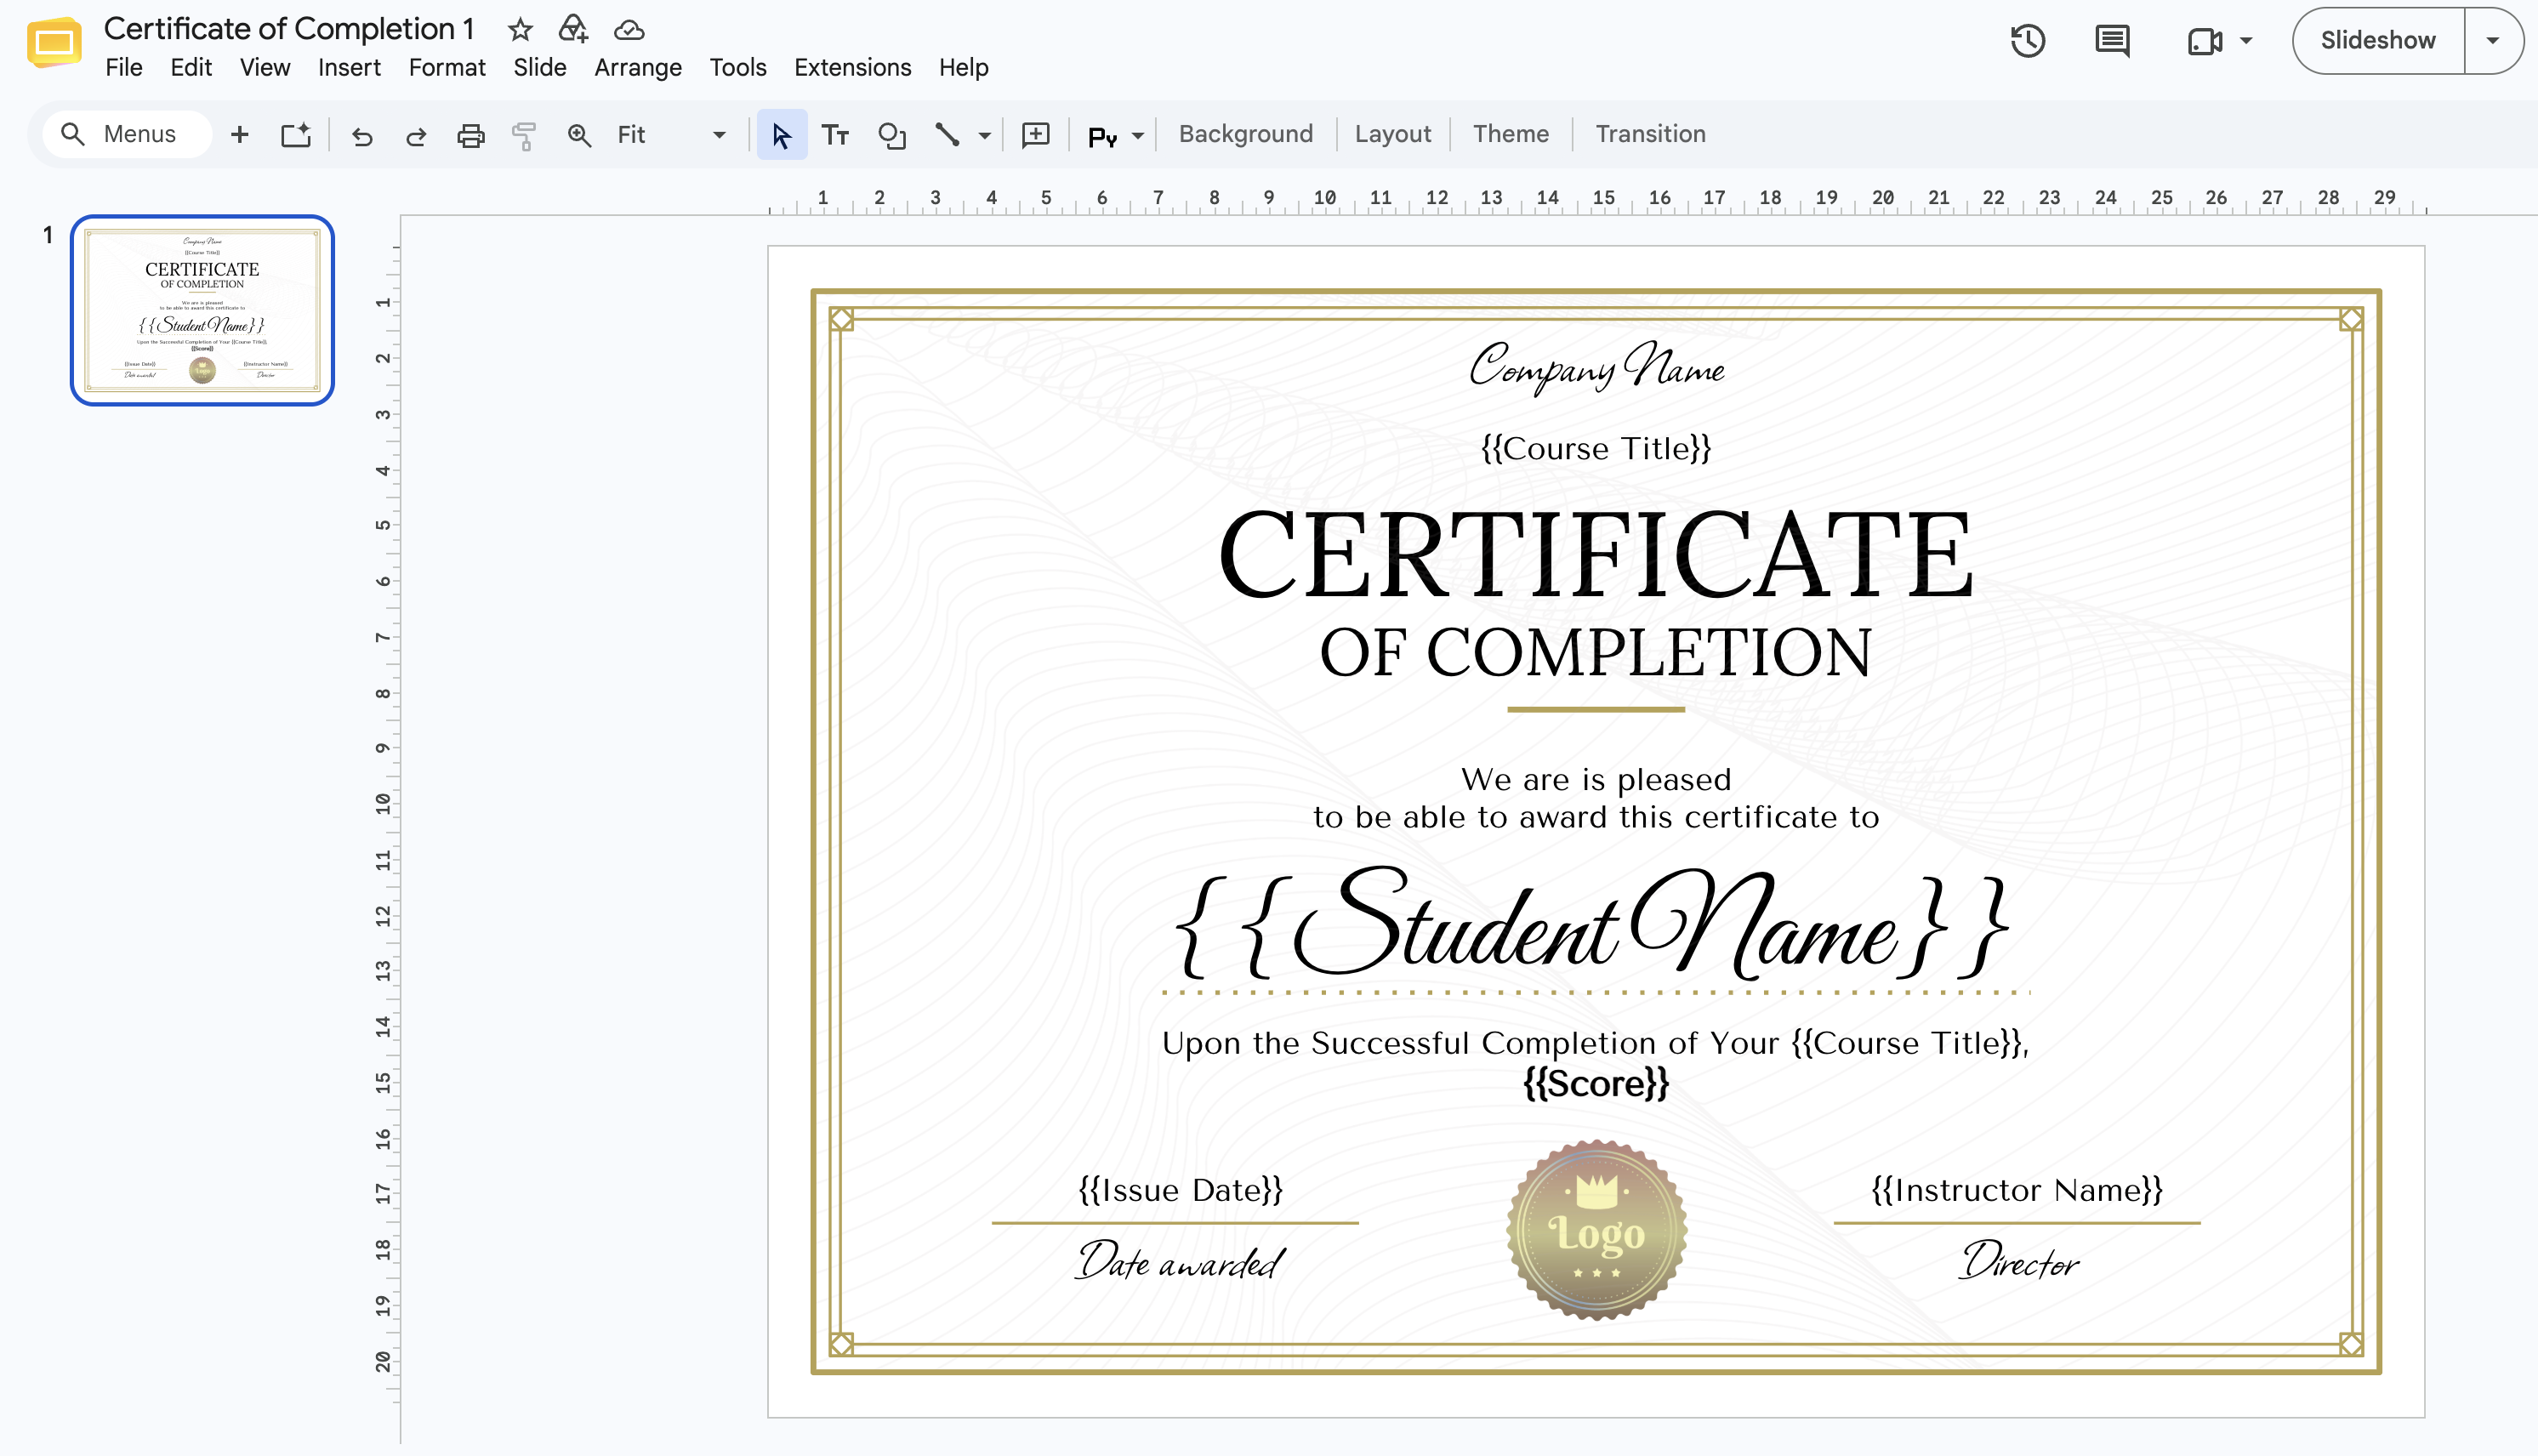
FolderNest automatically creates a master Google Slide certificate template in your Drive. Opening the template reveals placeholders formatted with double curly braces `{{...}}`.
Pro Tip
Pro Tip: Any text wrapped in `{{marker_name}}` inside your Google Slides or Google Docs will be replaced dynamically with the corresponding value from that row in your Google Sheet.
Step 5: Configure Model Name, Sheet Tab, and Generation Triggers
Back in FolderNest, set a descriptive Template Name (e.g., *Certificate of Completion 1*) and select the Source Google Sheet tab where your recipient data is stored.
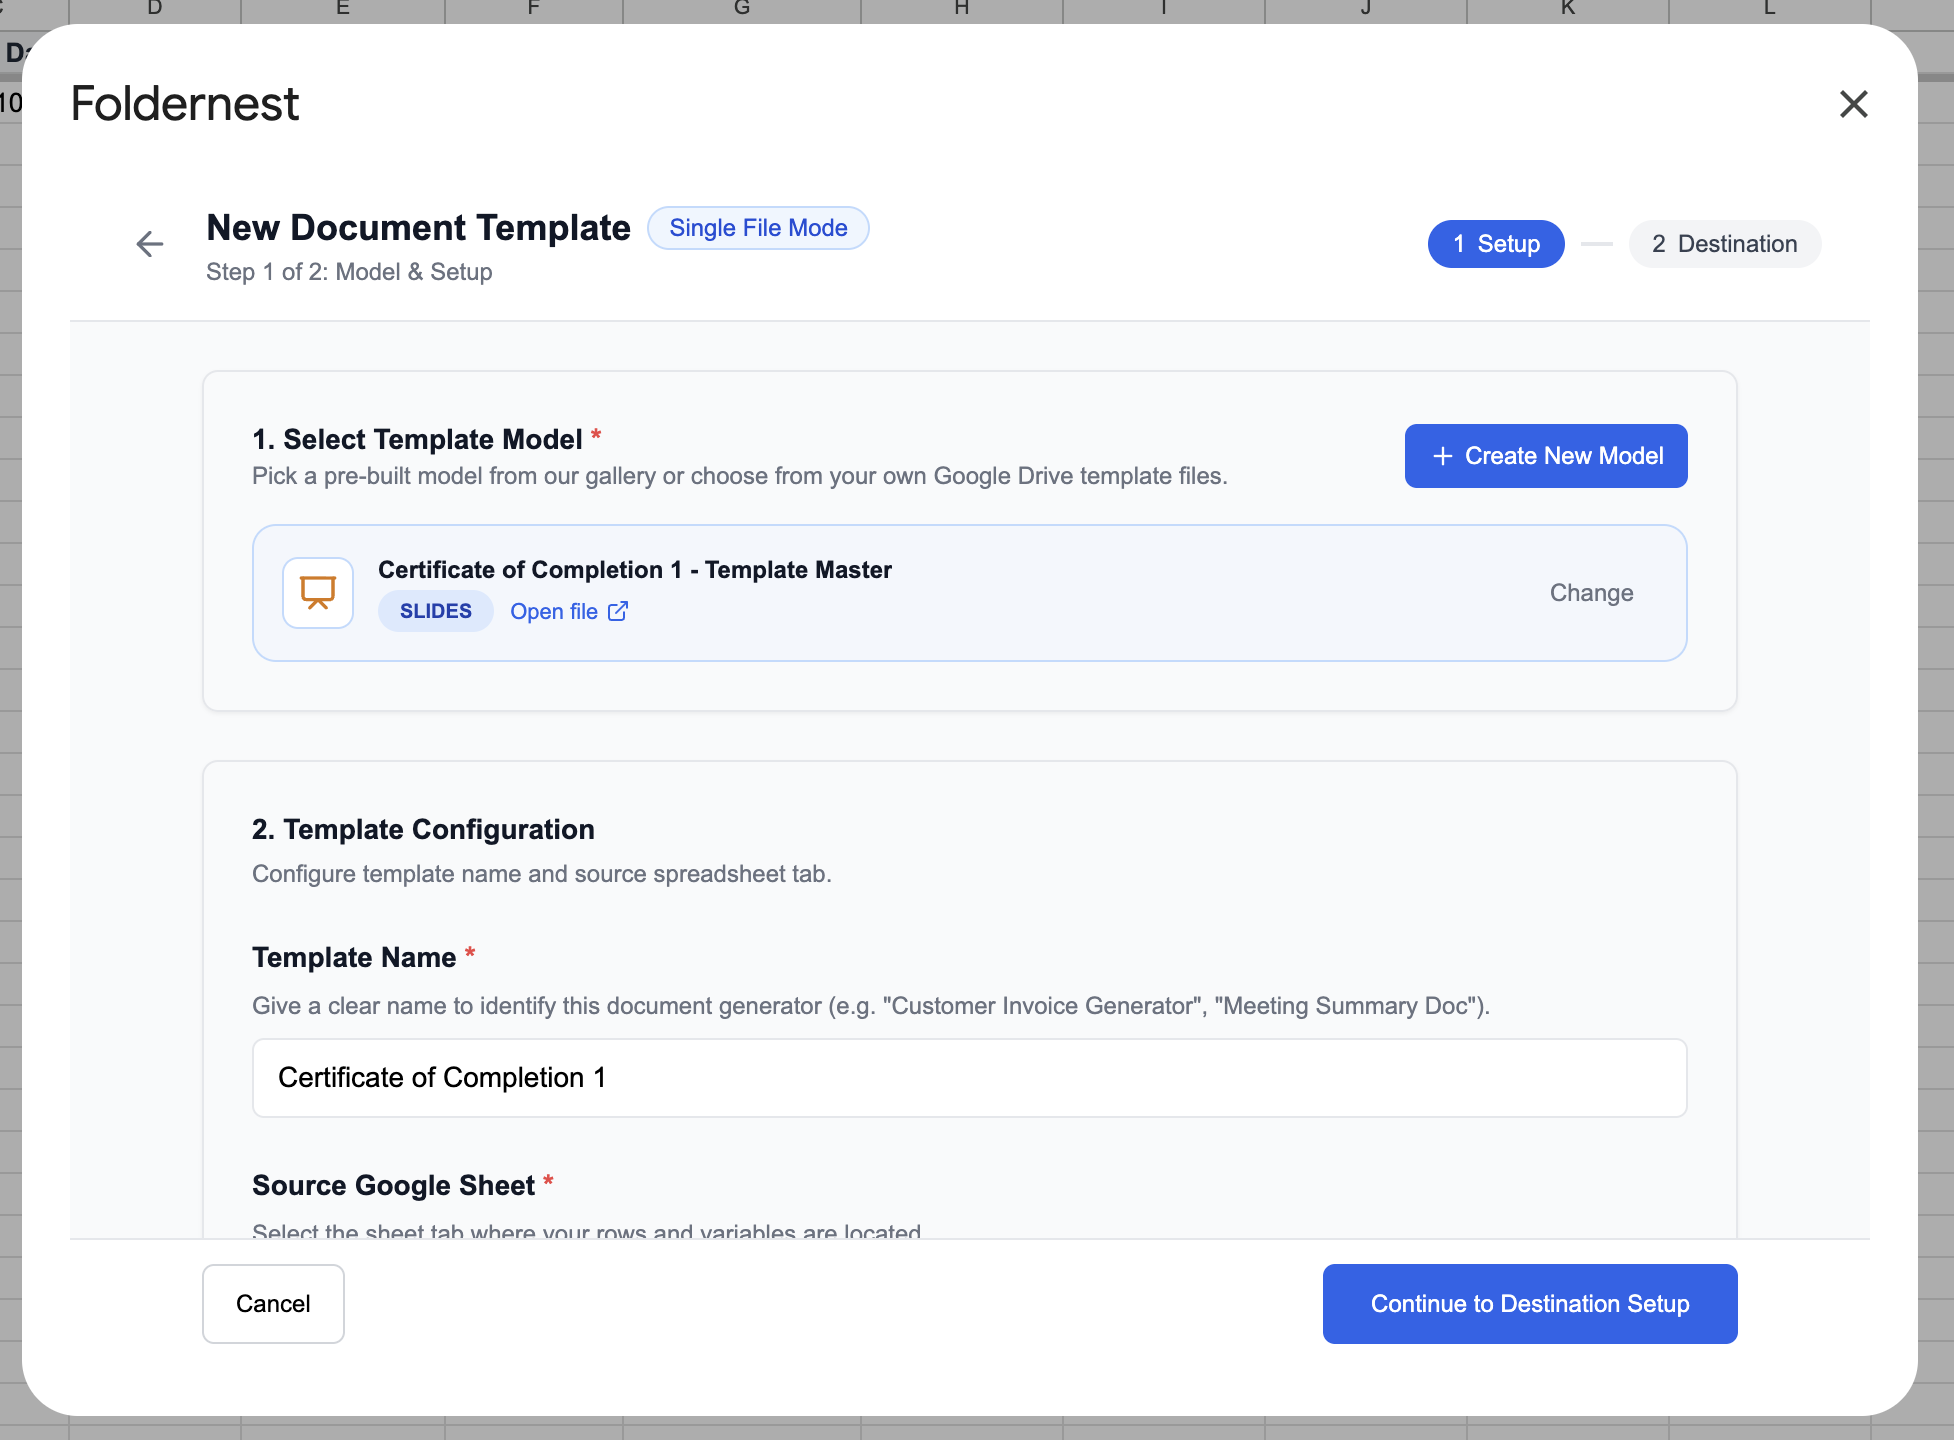
Next, configure how you want certificates to be generated under Generation Triggers:
- Manual Generation (Selected Rows): Allows you to select specific rows in Google Sheets and click *Run for Selected Rows*.
- Automatic on Form Submission: Automatically generates a certificate whenever a new row is submitted via Google Forms, Typeform, Tally, JotForm, or Fillout.
Step 6: Set File Naming, Destination Folder & Output Column
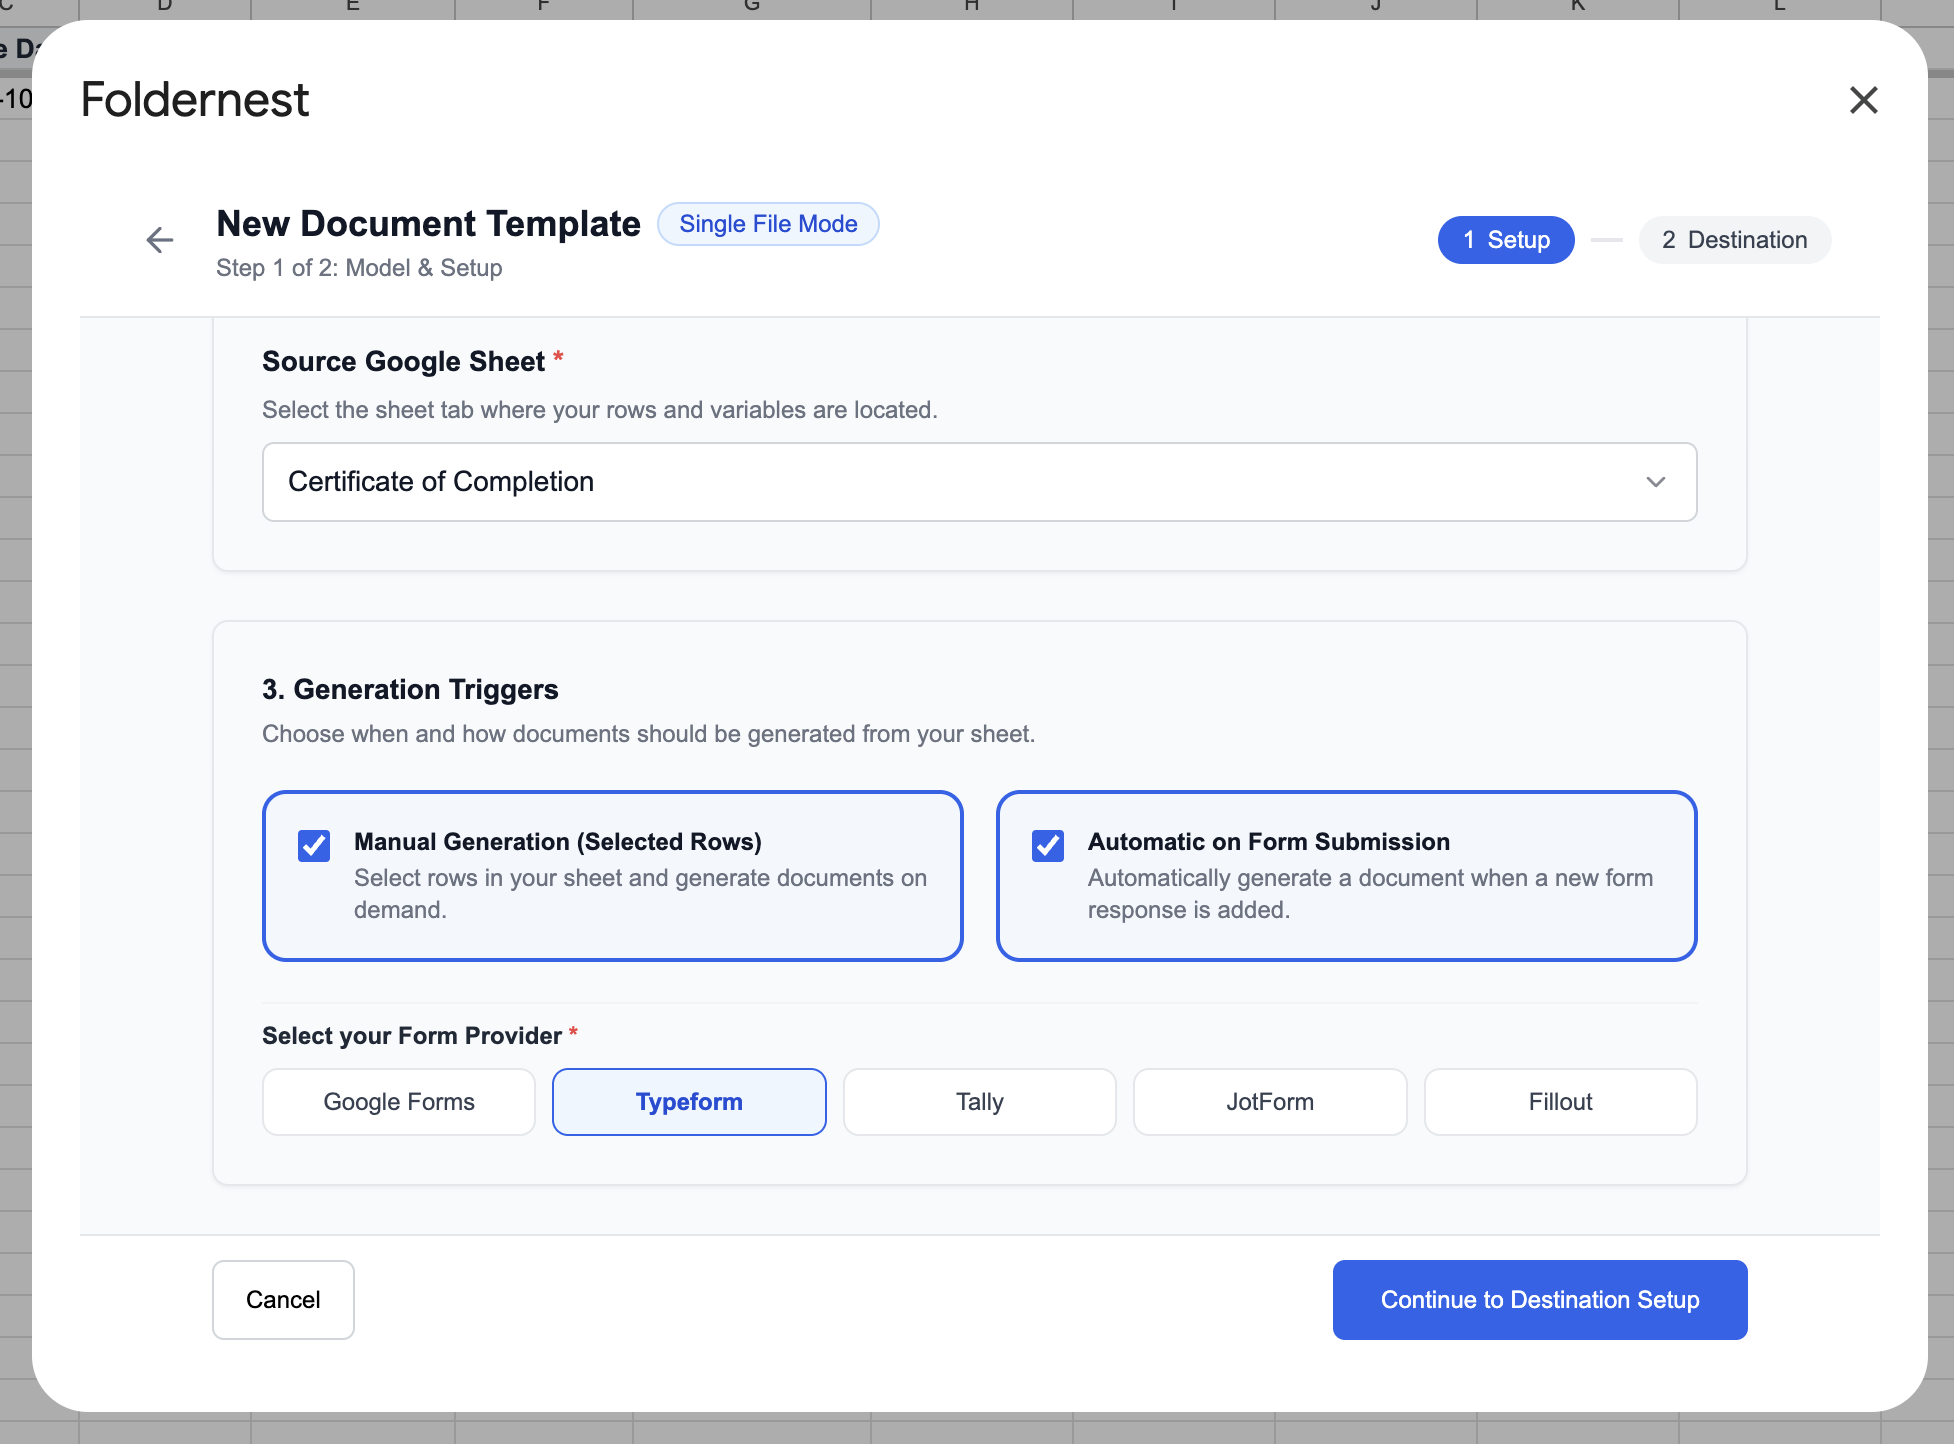
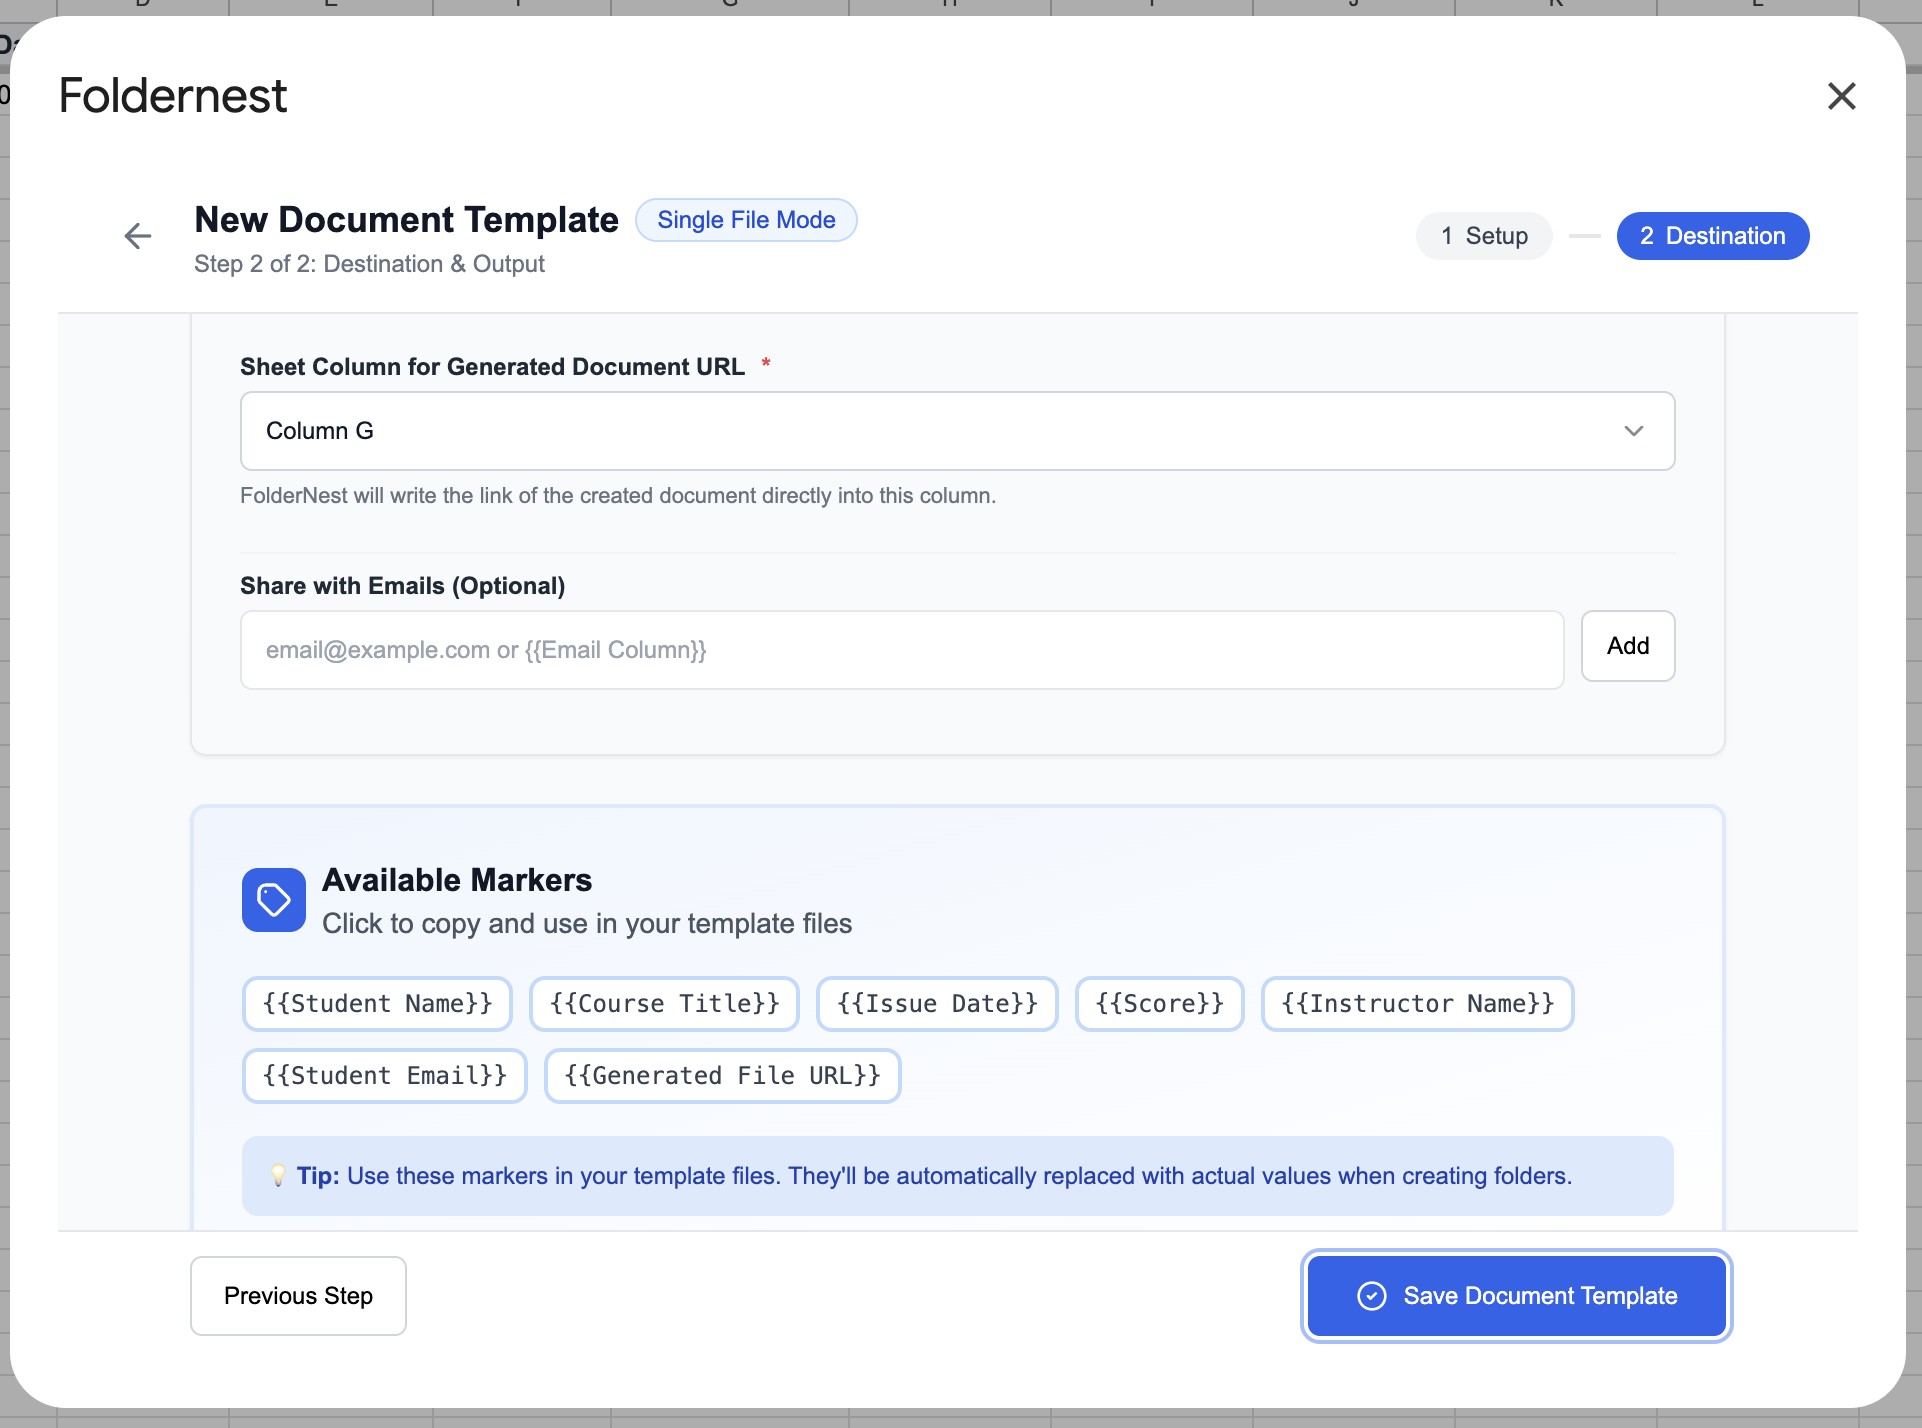
In Step 2 of the setup wizard, configure how each certificate is named, where it is stored in Google Drive, and how links are recorded in your spreadsheet:
- Generated Document Name: Use dynamic column pills like `Certificate of Completion - {{Student Name}}` for organized file management.
- Replace {{markers}}: Ensure the checkbox *'Replace {{markers}} inside the document body with values from the sheet row'* is checked.
- Google Drive Target Folder URL: Paste the URL of your Google Drive destination folder or click *Create in Drive*.
- Sheet Column for Generated Document URL: Pick the column (e.g., `Column G`) where FolderNest will automatically write back the URL of each created certificate.
- Share with Emails (Optional): Add `{{Student Email}}` to automatically share the generated certificate with the recipient.
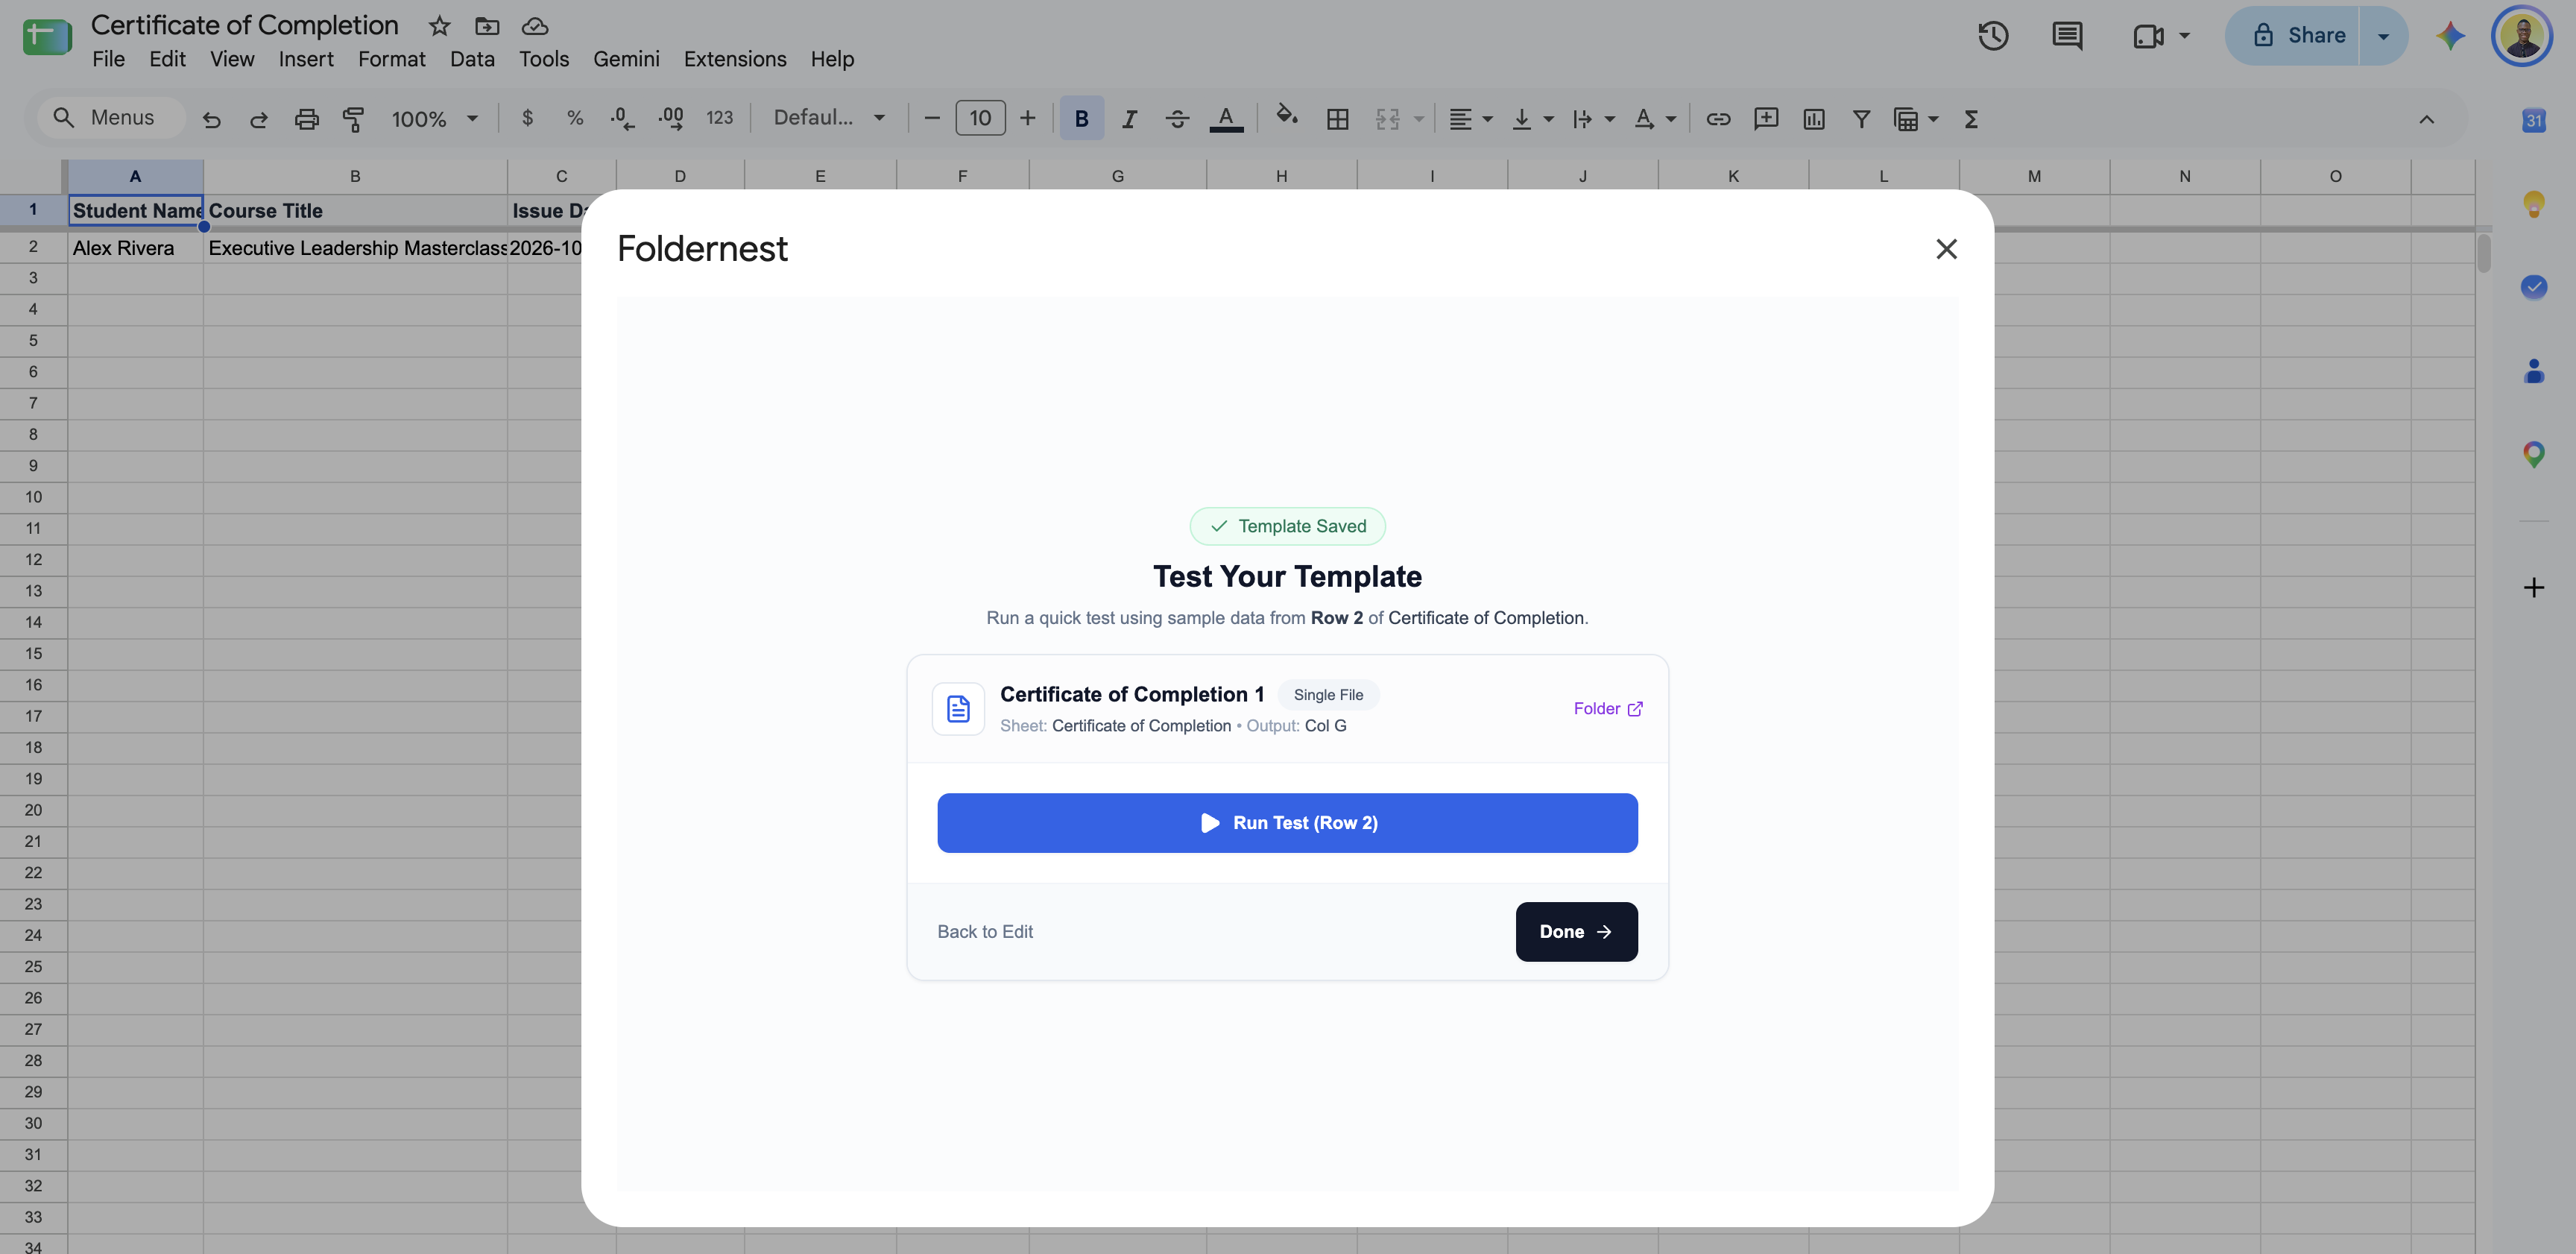
Step 7: Test Your Template Safely Before Going Live
FolderNest includes a built-in safe testing screen. Instead of testing blindly on production data, you can run a single sample generation using data from Row 2.
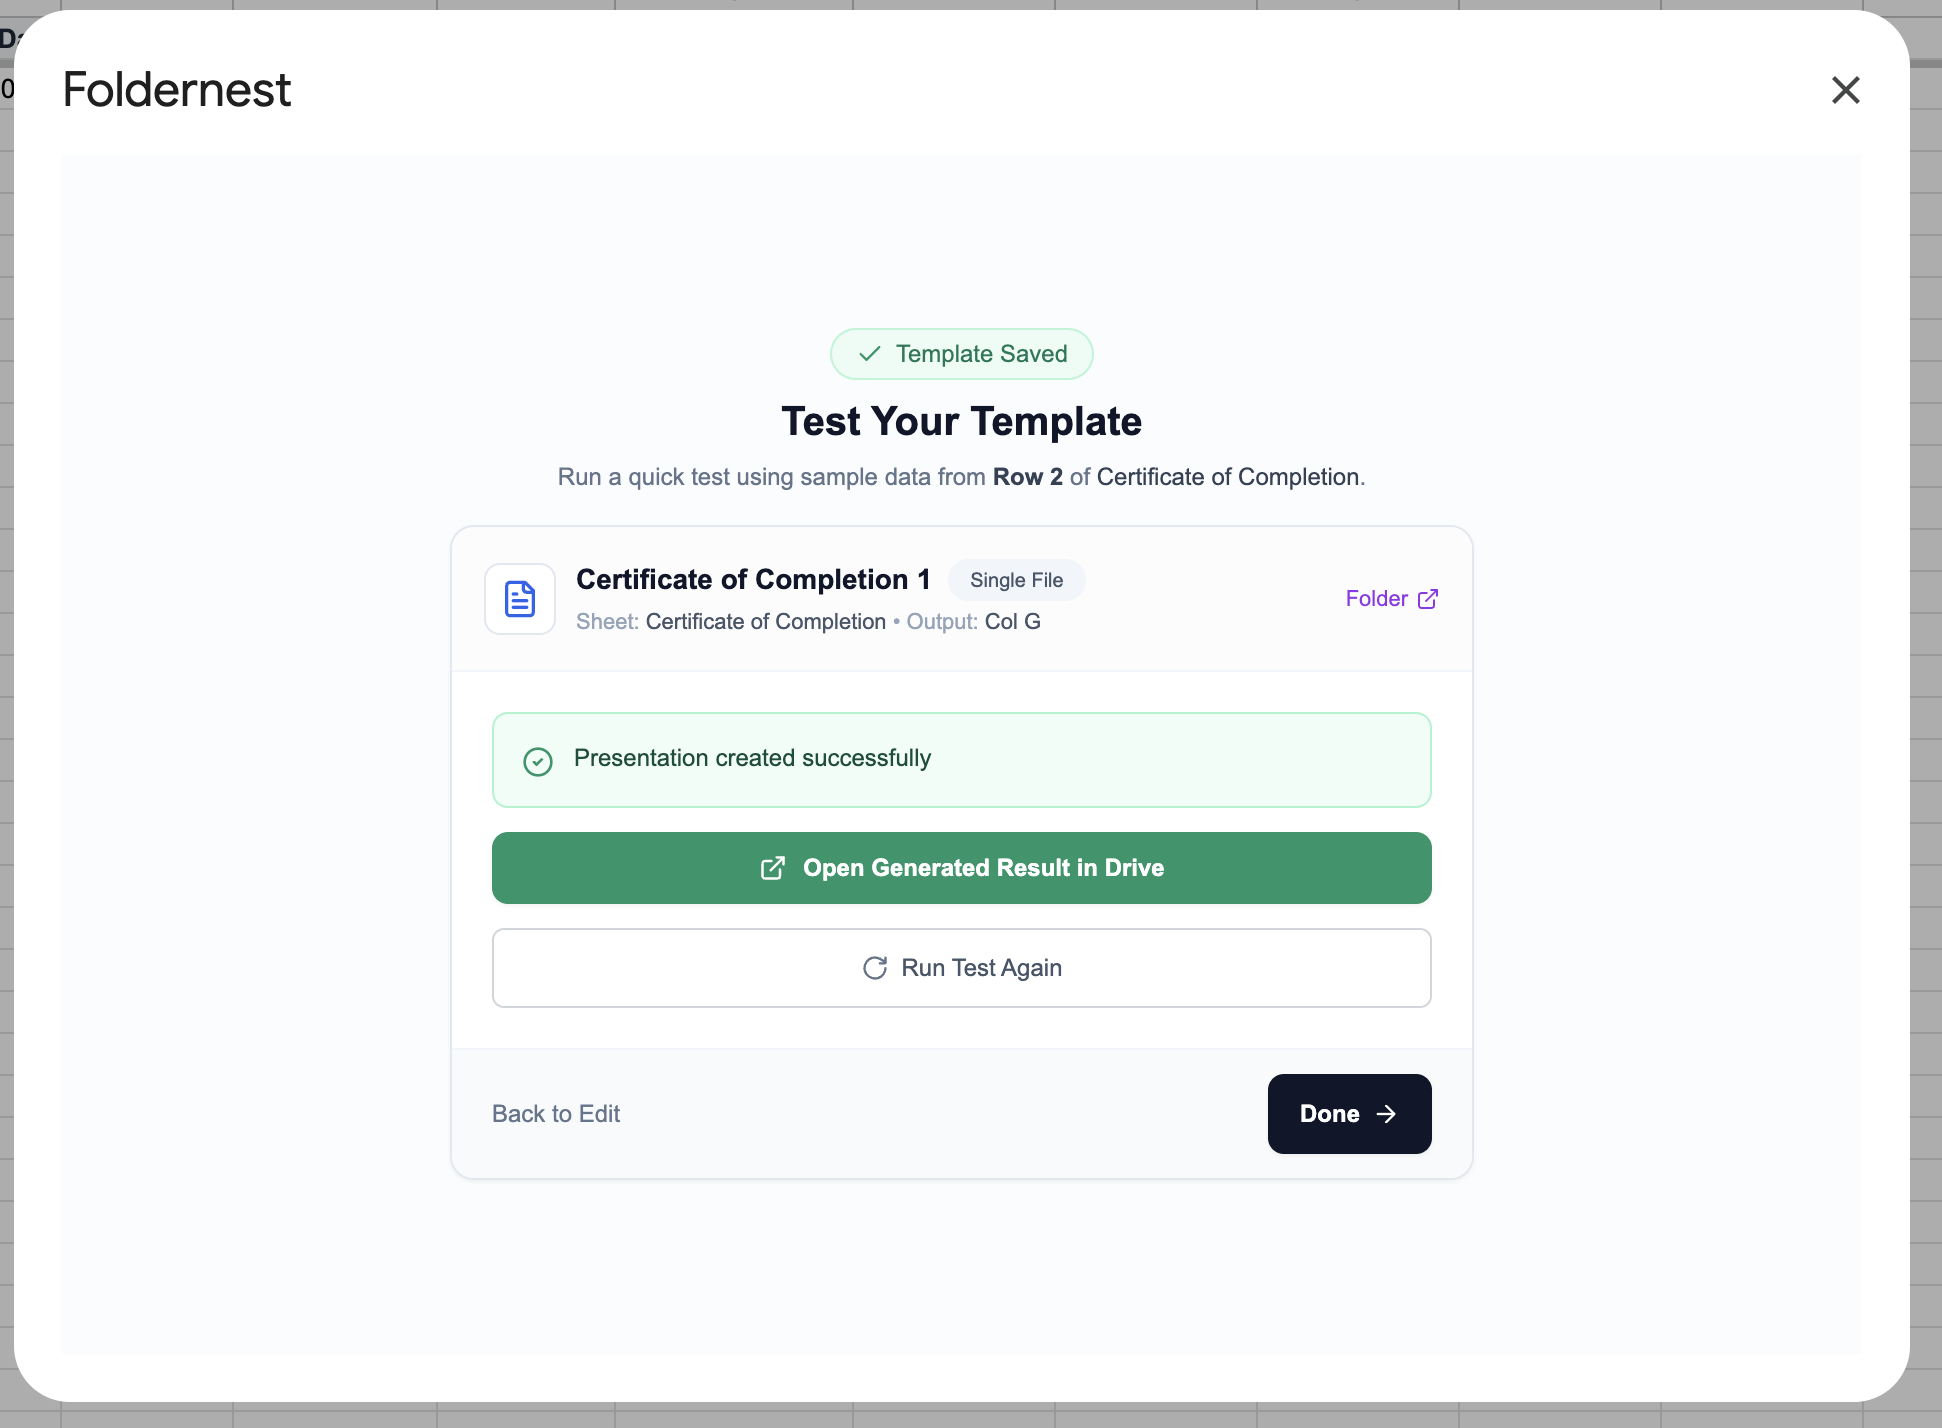
Within seconds, FolderNest creates the personalized Google Slides presentation in your Google Drive and displays a confirmation with an instant link to inspect the result.
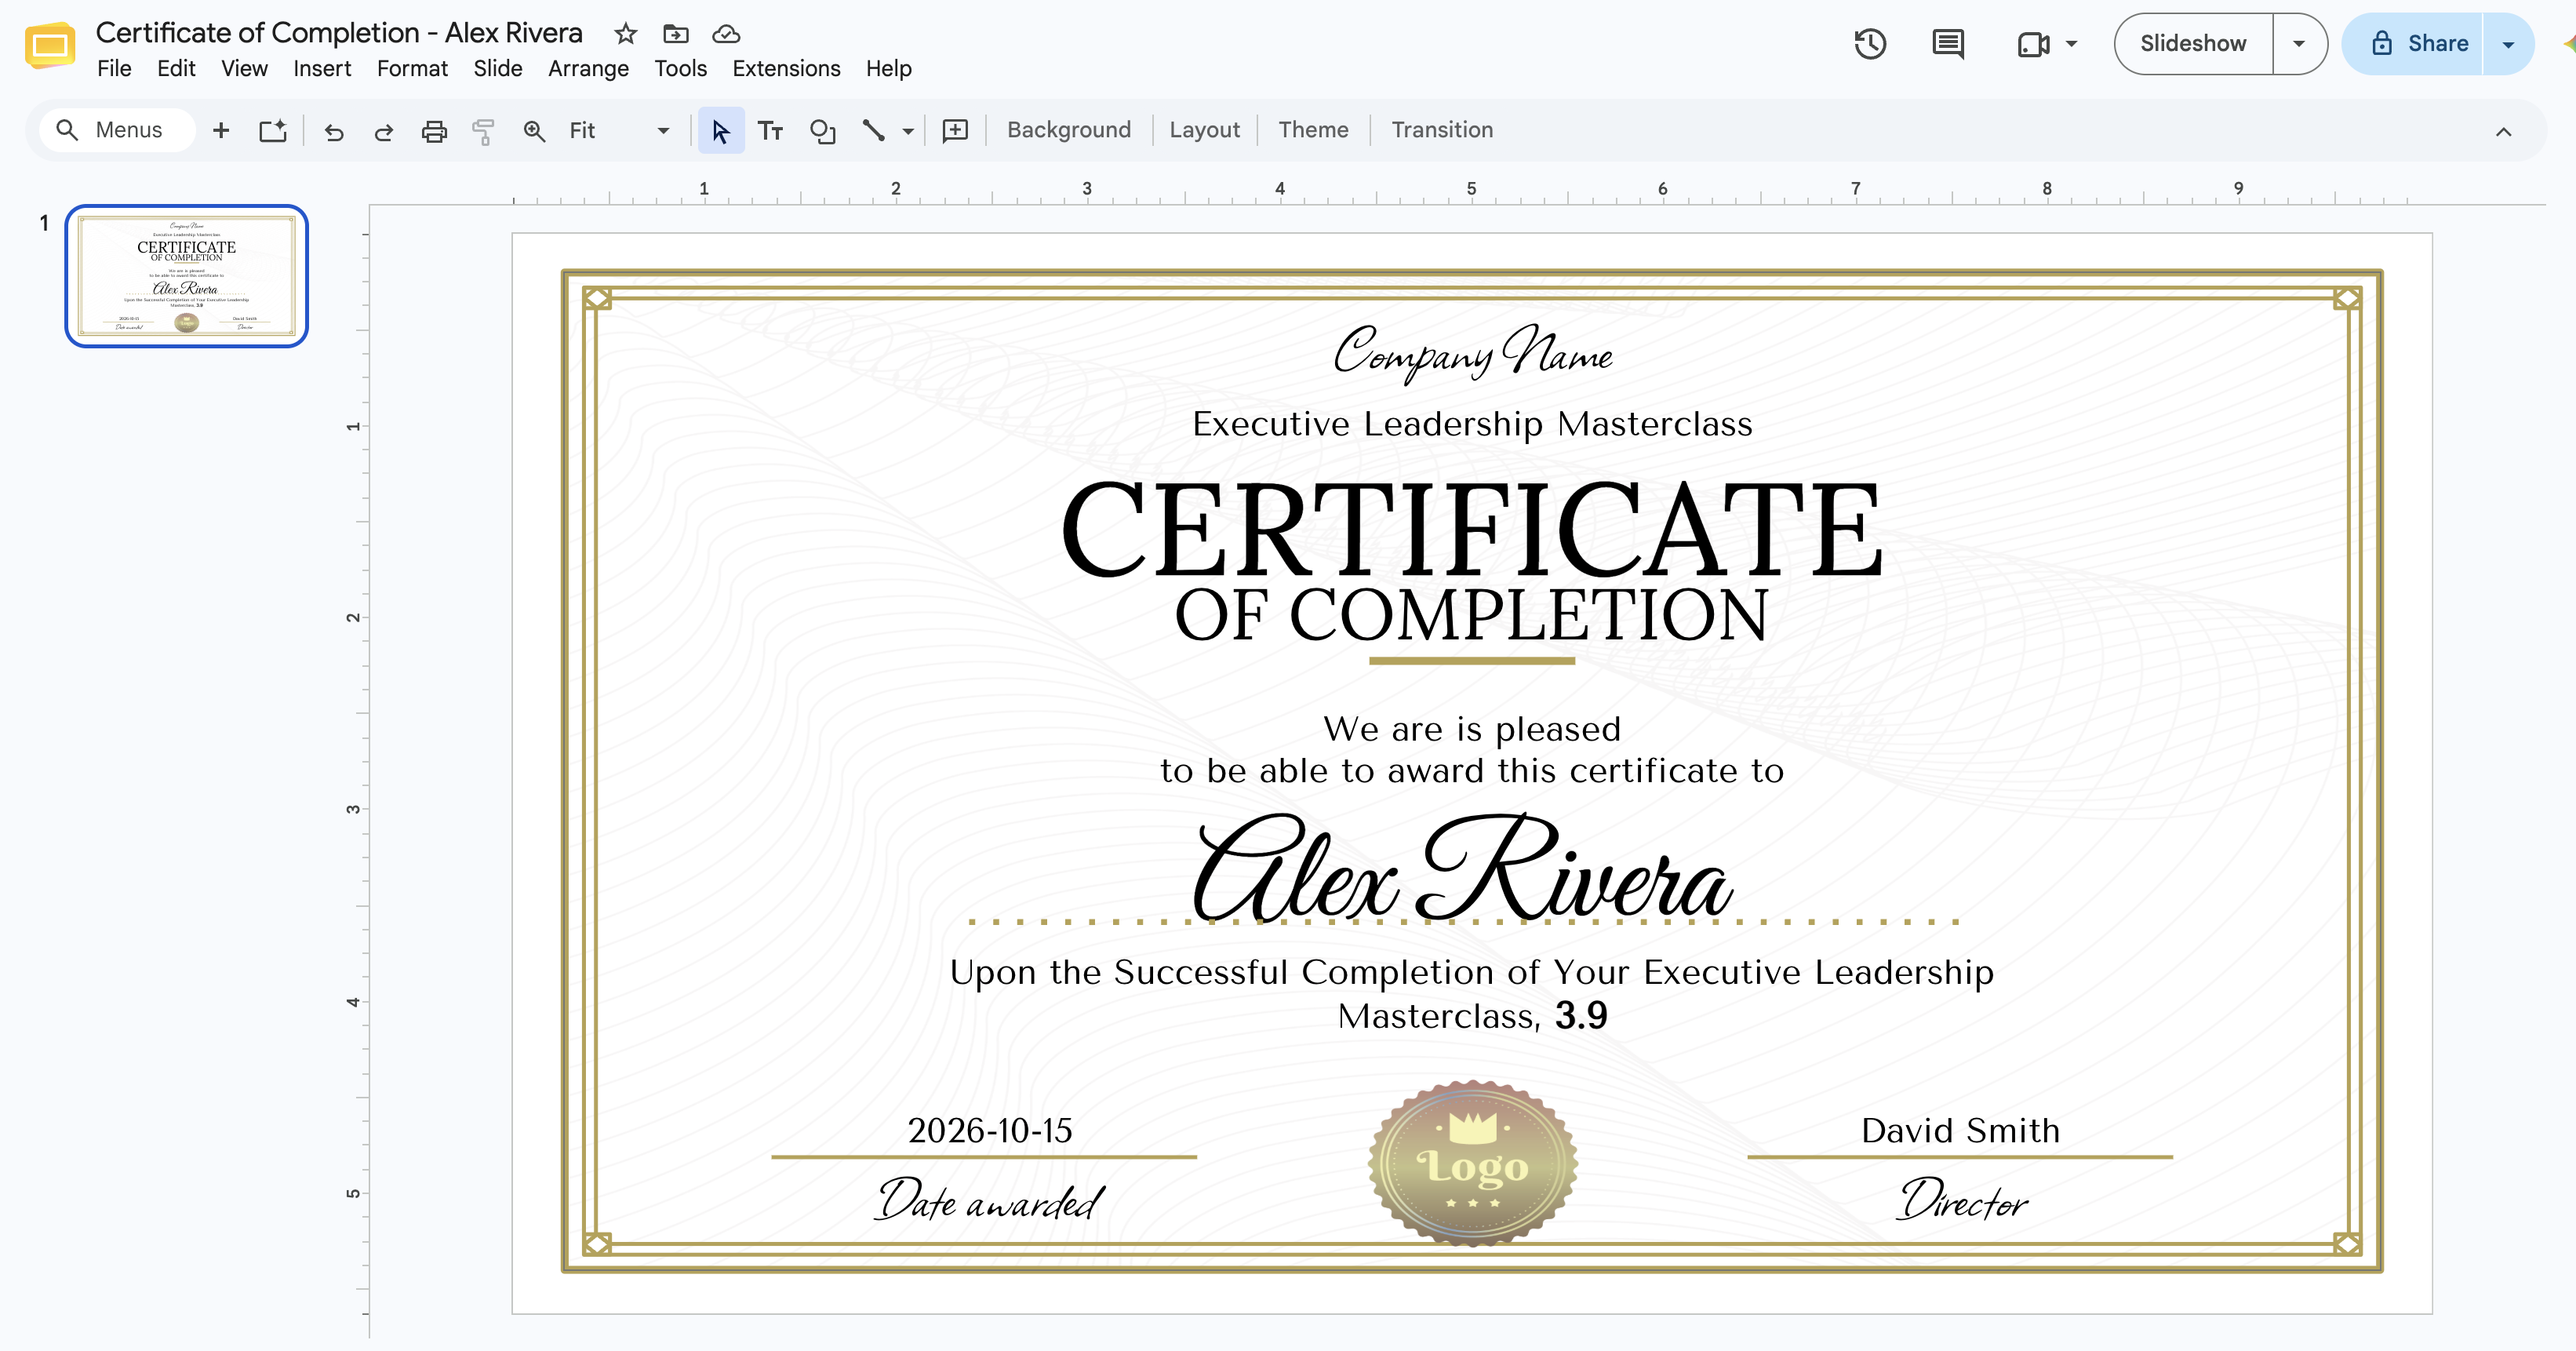
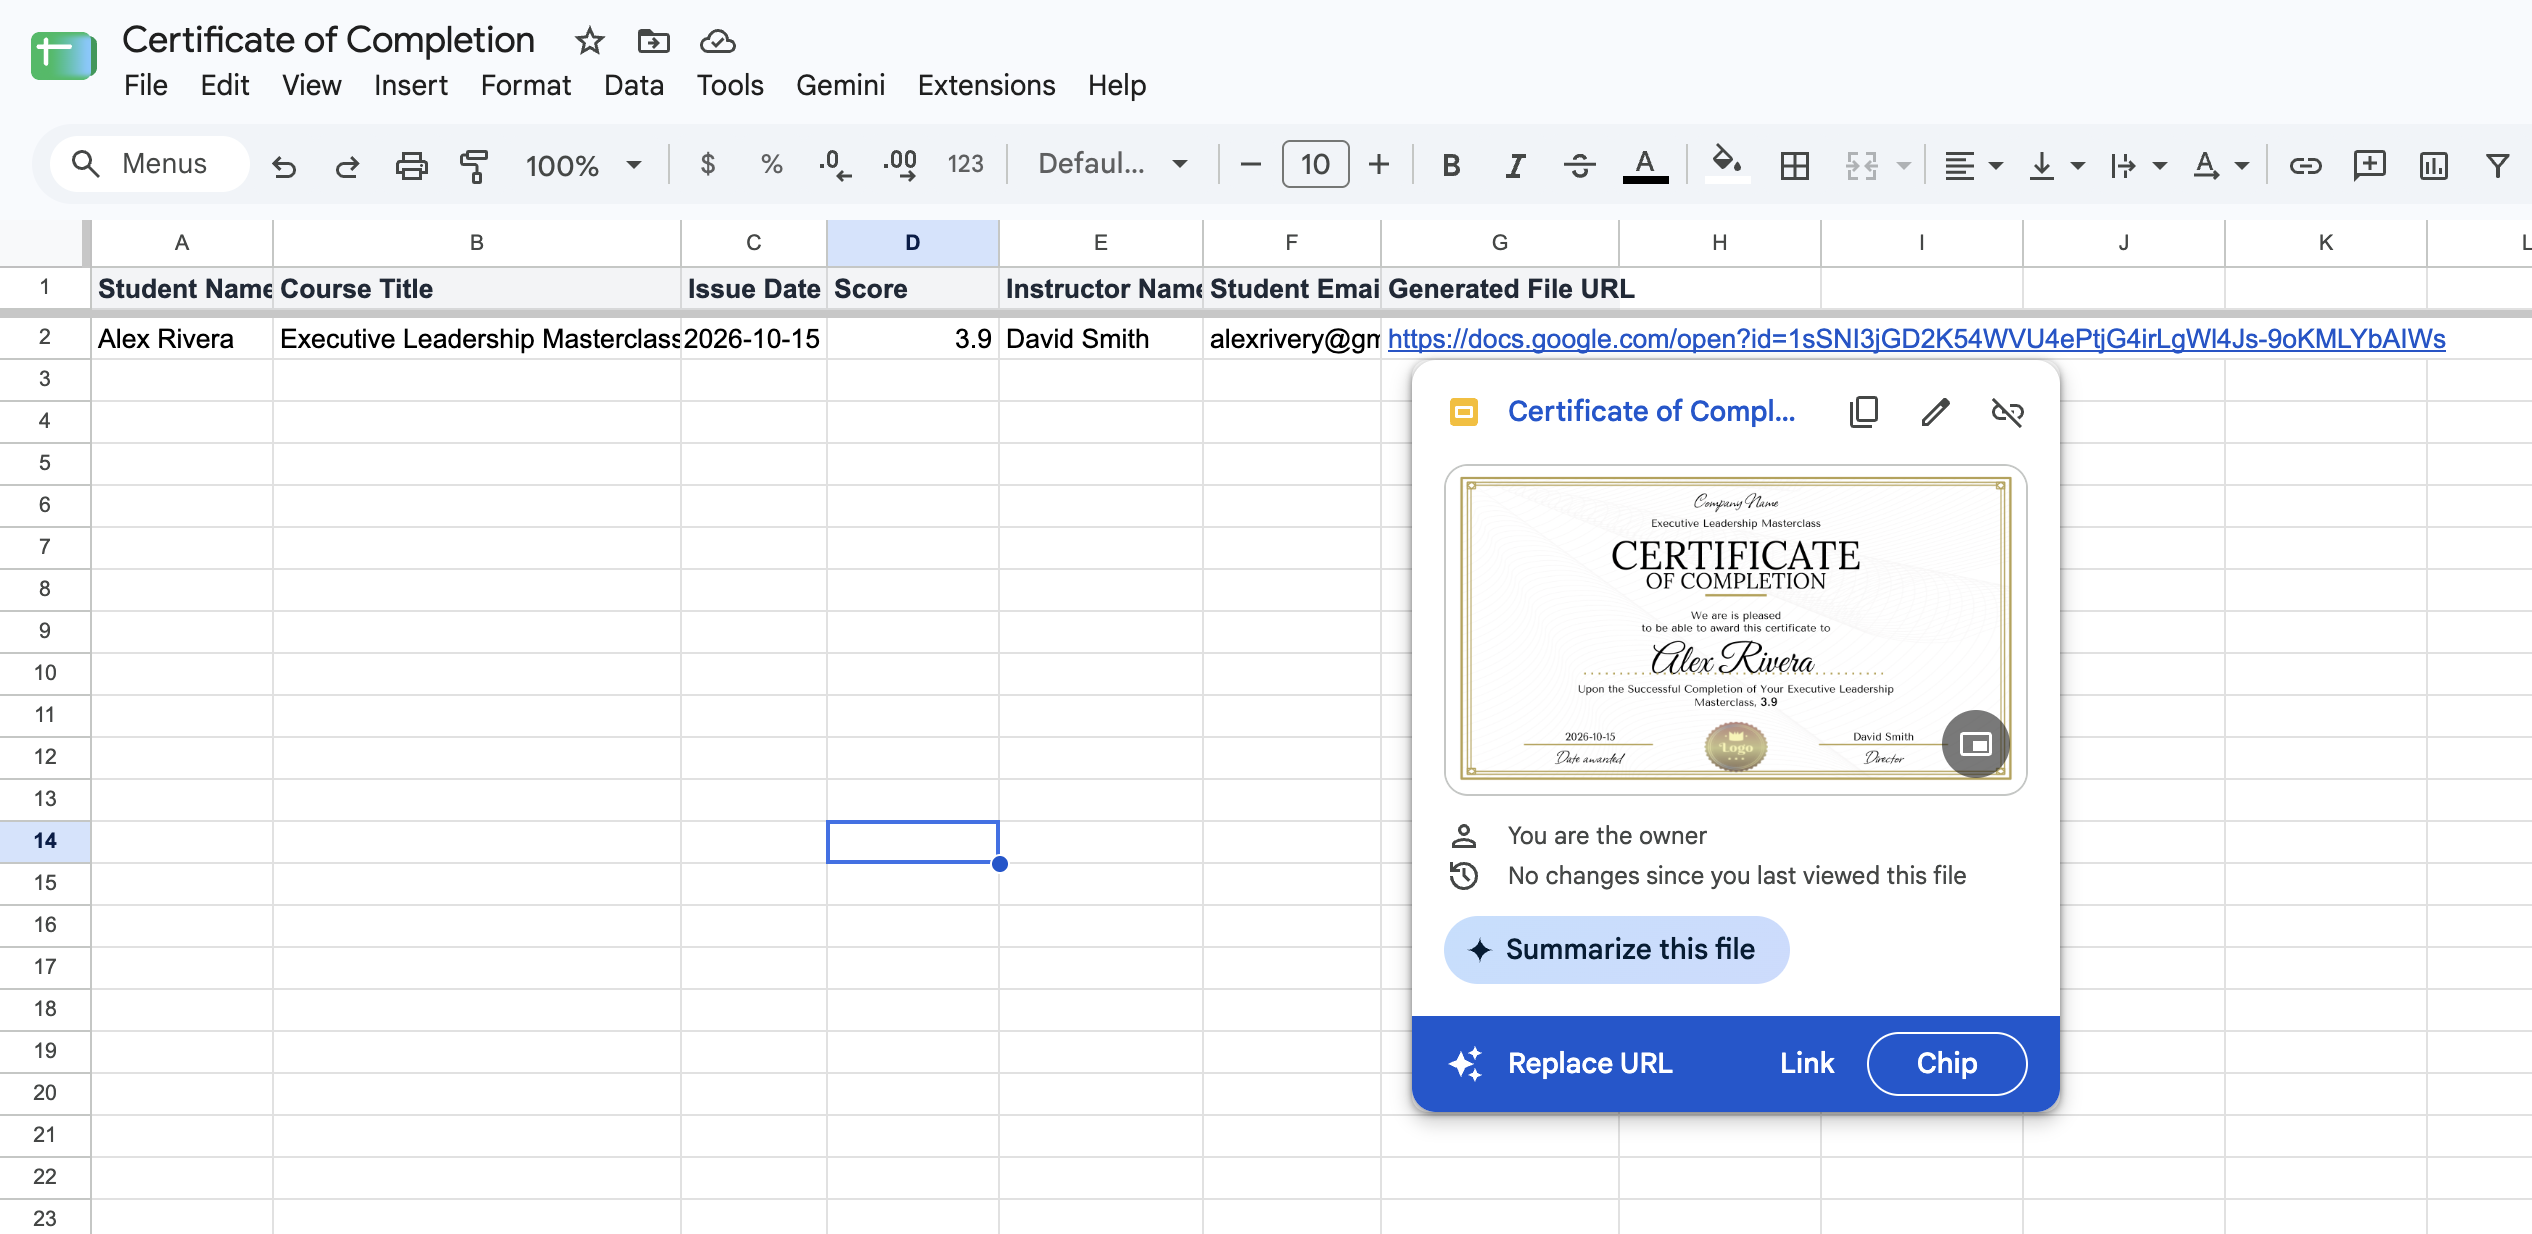
Opening the generated file confirms that every dynamic placeholder (`{{Student Name}}`, `{{Course Title}}`, `{{Score}}`, `{{Issue Date}}`, `{{Instructor Name}}`) has been replaced seamlessly with accurate student data:
Step 8: Production Automation & Real-Time Tracking
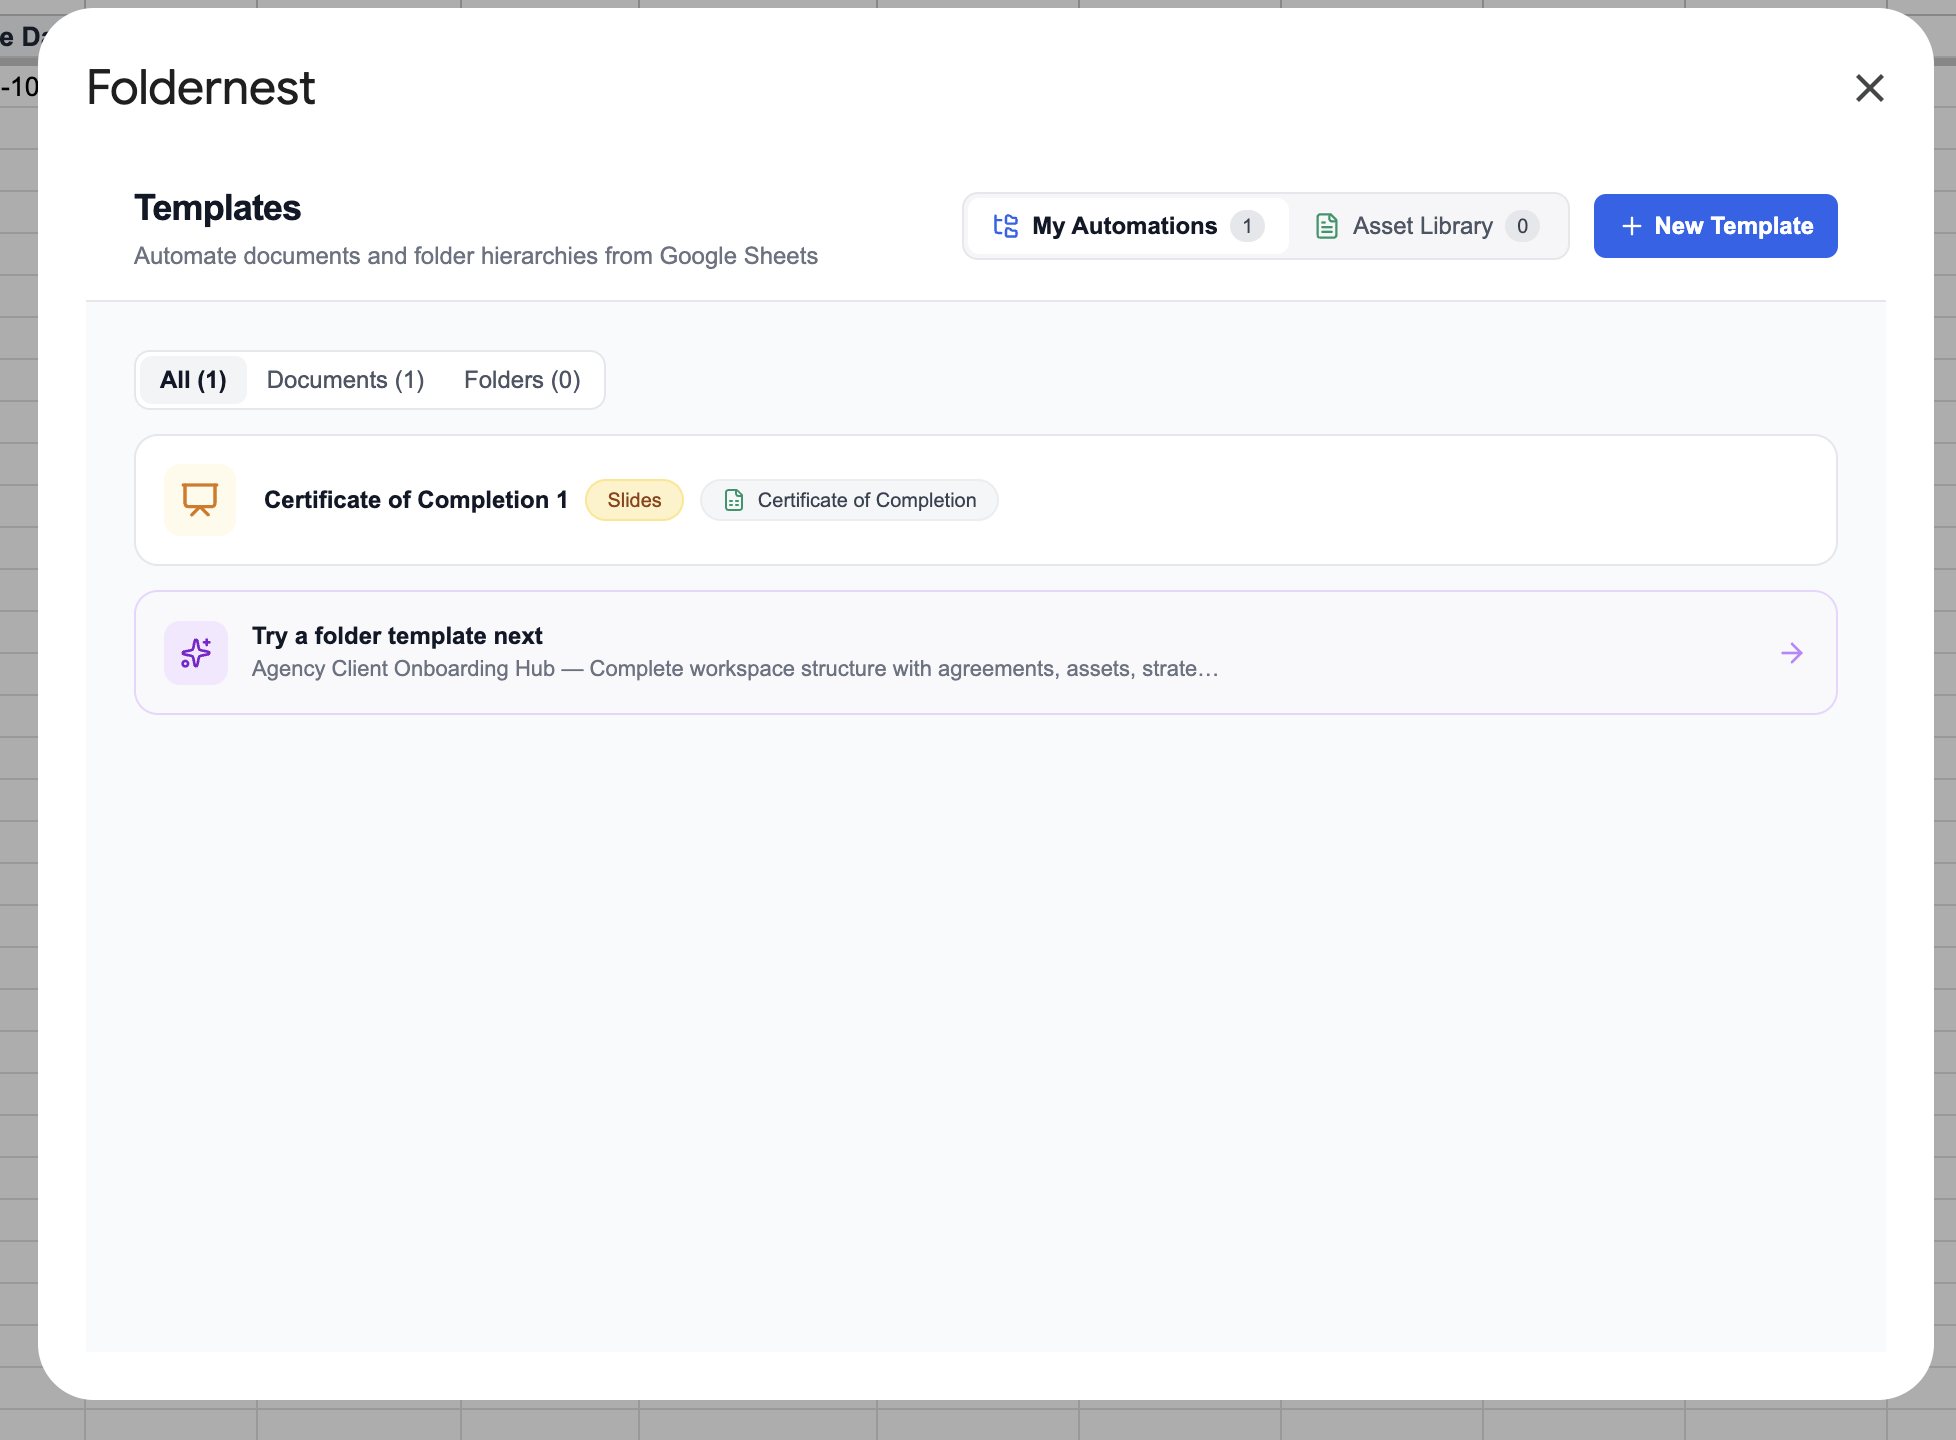
Once verified, click Done. Your automation is now active and accessible anytime under My Automations in the FolderNest dashboard.
Whenever a certificate is generated — either on form submission or via batch selection — FolderNest writes the exact link directly into your spreadsheet column with native Google Drive hover previews:
Summary of Comparison: Manual vs. FolderNest Certificate Automation
| Feature / Capability | Manual Certificate Creation | FolderNest Automation |
|---|---|---|
| Setup Time per Certificate | 3 to 5 minutes each | Instant (< 2 seconds) |
| Risk of Typos & Errors | High | Zero (Exact Sheet / Form data) |
| Live Form Integration | Manual entry | Google Forms, Typeform, Tally, JotForm, Fillout |
| Drive File Organization | Manual filing & renaming | Automated folder & dynamic naming |
| Direct Spreadsheet Tracking | Manual copy-paste URL | Automatic URL writeback with chip preview |
| Technical Skill Required | Apps Script coding for automation | No-code visual wizard |